Manual
The EOF Manual
Categories
Command Line Parameters
Command Line Parameters
EOF supports some command line parameters, most of which are to automatically load files when EOF starts up. This makes it convenient for opening files. If you set EOF as the program associated with .eof files, EOF will launch and open a chart when you double-click on a .eof file. Or in Windows, if you didn't want EOF to be your default application for opening MIDI files, you can still quickly have EOF launch and import a MIDI file by right-clicking on the MIDI file and using "Open With". Opening a file this way causes EOF to be given the path to the file over the command line, and it is able to access the file to perform various tasks automatically when it starts.
In Windows, to set the file association for a file type (such as files with names ending in .eof), right-click one of the files in question and select Open With > Choose Program. Windows may or may not have some programs it suggests here based on what it thinks may open the program, as well as other programs you may have opened that file type with in the past by right-clicking on them. If you don't see EOF in the list, click the Browse button. Browse to where you have saved the EOF program, select eof.exe (or the appropriate file name if you have renamed it) and click Open. Windows will return to the "Open With" dialog, and EOF should now appear in the Recommended Programs list. If you select EOF here and check the checkbox that says "Always use the selected program to open this kind of file" (that's what Windows XP says, other Operating Systems should have something similar), EOF will become the program that is launched to open this file type (based on its file extension, such as .eof) once you click the OK button. After clicking OK, EOF will open and will automatically open the file if it is supported. After you have used Open With to open a file, it will be listed in the "Recommended Programs" for that file type so you won't even have to manually browse to EOF again in the future (unless you install EOF to a different location), and you usually won't even have to click "Choose Program", as it will list EOF in the immediate context menu that is presented when you right-click on the file and mouse over "Open With".
Alternatively, you can pass EOF a file over the command line by dragging and dropping the file onto the EOF program icon (the executable file).
Here is a list of actions that you perform by loading files over the command line:
| Extension | Action |
|---|---|
.eof |
Load EOF project (See File>Load) |
.mid |
Import MIDI file (See File>MIDI Import) |
.rba |
Import MIDI from Rock Band Audition file (See File>MIDI Import) |
.chart |
Import Feedback chart (See File>Feedback Import) |
.pak.* |
Import Guitar Hero file (See File>Guitar Hero Import) |
.rif |
Import Bandfuse chart (See File>Bandfuse Import) |
.xml |
Import Rocksmith chart (See File>Rocksmith Import) |
| or | |
| Import Go PlayAlong XML file (See File>Guitar Pro Import) | |
.gp3, .gp4, .gp5 |
Import Guitar Pro file (See File>Guitar Pro Import) |
.ogg, .mp3, .wav |
Create new chart with an existing audio file (See File>New) |
Configure EOF
Configuring EOF
Finding the Right Buffer Size
It is important to set the Buffer Size to a good setting for your computer. Differences in hardware configurations mean that not all computers will operate properly with the default buffer size (4096). To test, load the example song and press play. If the audio stutters or crackles, the buffer size is too small. Increase it in the Settings dialog:
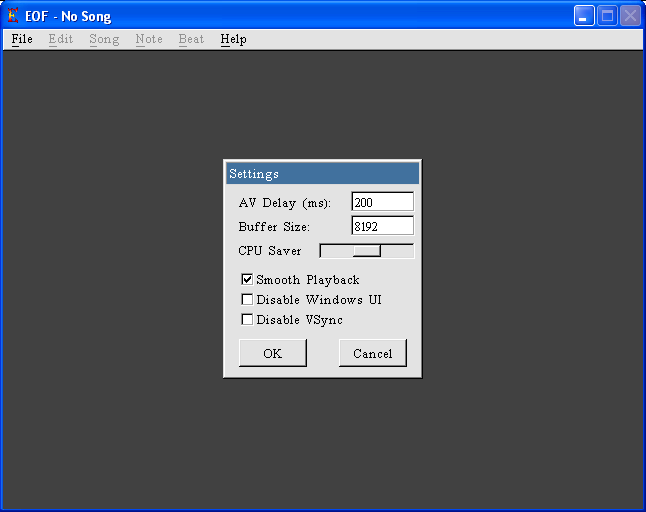
Try 8192, then 16384, if needed. If stuttering persists, your computer may not be powerful enough to run EOF. Note that the buffer size affects the AV delay, so you may need to update that setting (see Setting Up Your AV Delay).
Setting Up Your AV Delay
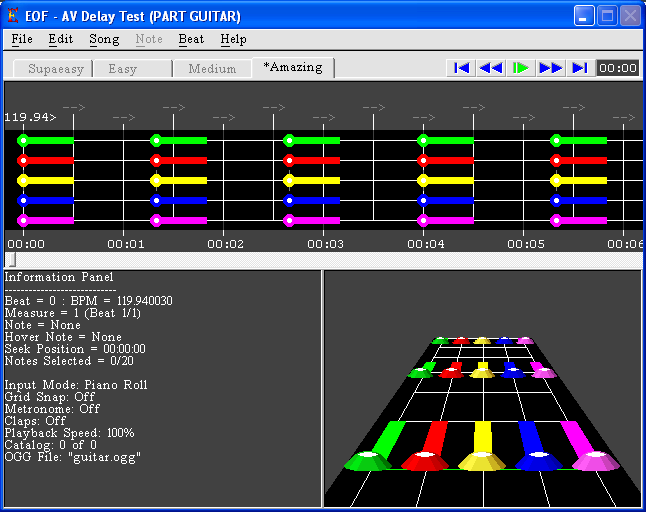
First, load the "AV Delay" song included with EOF:
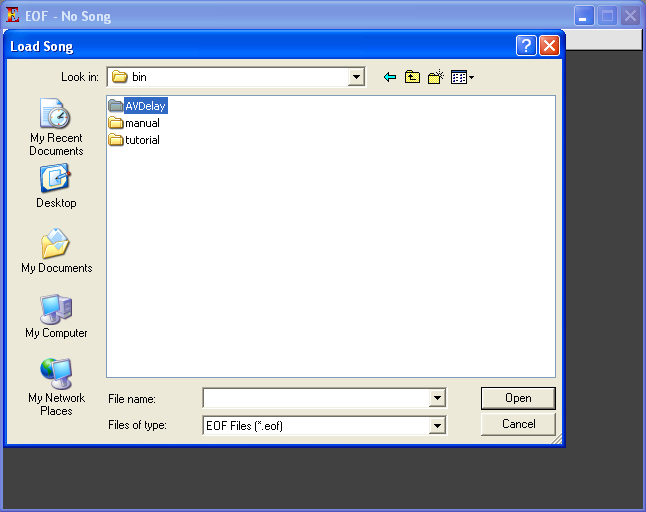
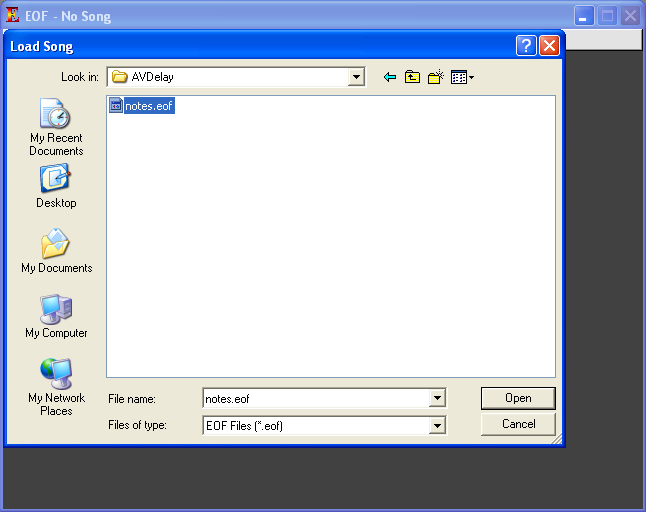
When the song is loaded, the screen will look like this:
Press the space bar to play the song. A green line will move across the editor pane:
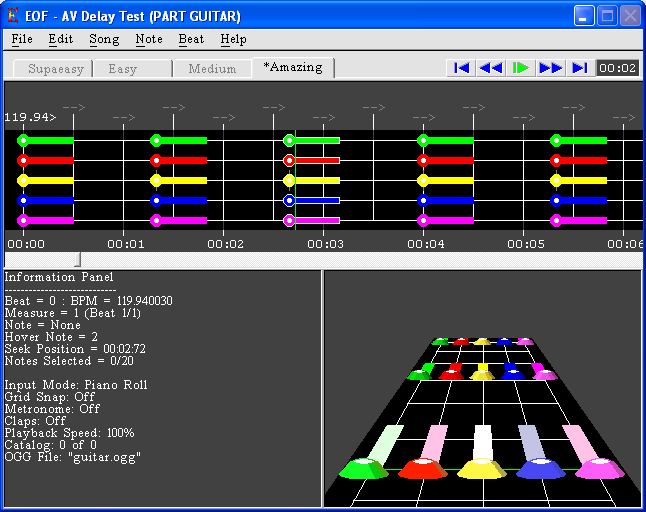
Adjust the AV delay while the song plays using the + or - keys until the green line passes over the notes in sync with the sound. You can also adjust this setting in the Settings dialog.
Setting Up Your Song Folder
The EOF Song Folder is where new projects are created. By default, projects are stored in the same folder as EOF. To change the folder:
- Select File > Song Folder from the menu.
- Use the folder browser to choose a new location:
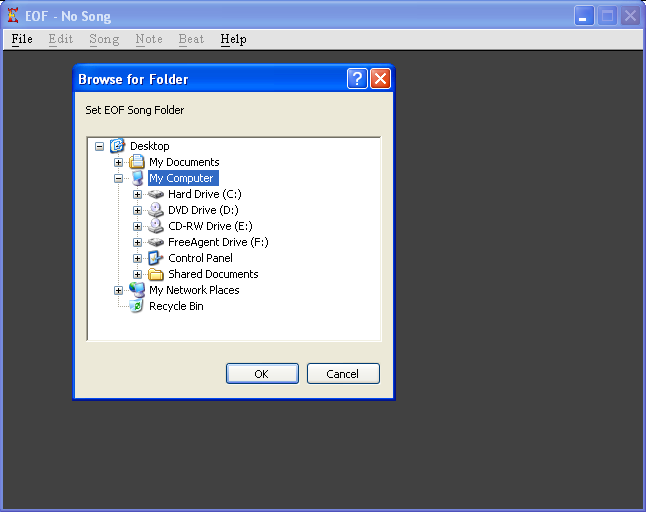
Each new project will be stored in a sub-folder of this directory.
Linking to FOF
You can link EOF to "Frets On Fire" to test your songs without copying files. To do this:
- Select File > Link To FOF.
- Browse to your
FretsOnFire.exefile:
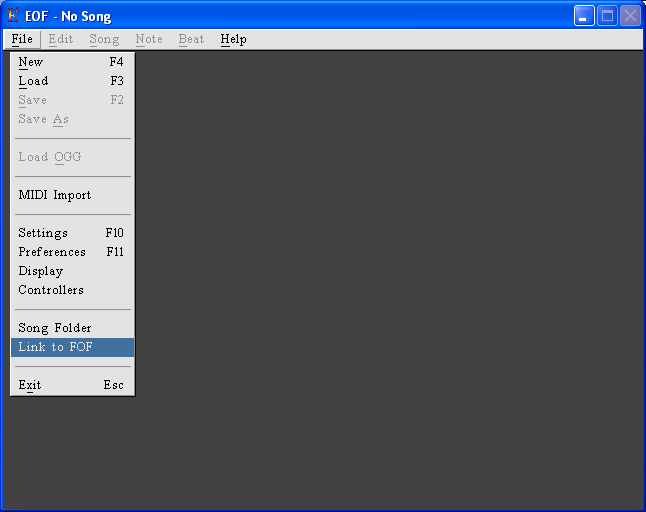
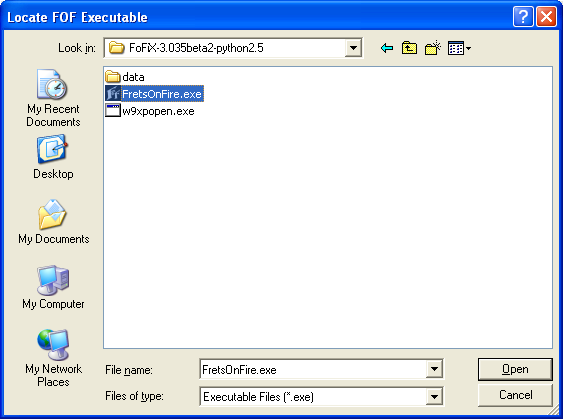
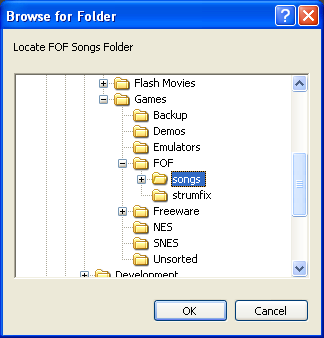
- Browse to your Frets On Fire song library base folder:
After setup, select Song > Test In FOF to test your project.
Linking to Phase Shift
To link EOF to Phase Shift:
- Select File > Link to Phase Shift.
- Browse to the Phase Shift executable file.
- Browse to the Phase Shift song folder.
This allows you to launch the currently open chart in Phase Shift's practice mode.
Other Settings
- MIDI Tone Delay: Adjust MIDI playback timing to account for external MIDI lag.
- CPU Saver: Reduces CPU usage by increasing idle time.
- Smooth Playback: Uses EOF’s timer for better synchronization of audio and video.
- Disable Windows UI: Uses EOF’s built-in file selectors.
- Disable VSync: Improves performance by skipping monitor refresh synchronization.
- Phase Cancellation: Reduces center-panned audio (e.g., vocals).
See File > Settings and File > Preferences for more details.
Preferences
General Preferences
- Inverted Notes: Flips note display in the fretboard editing area.
- Lefty Mode: Flips note display in the 3D Preview.
- Note Auto-Adjust: Keeps notes aligned with beat markers during adjustments.
- Enable Logging: Creates debug logs (
eof_log.txt). - Hide Drum Note Tails: Skips rendering drum note tails for performance.
- Disable Sound FX: Disables sound mixing during playback.
- Disable 3D/2D Rendering: Skips rendering to improve performance.
- Click to Change Dialog Focus: Requires a click to change input focus in dialogs.
For more details on preferences, refer to the manual section for Preferences.
Import/Export Preferences
- Save Separate Rocksmith 1 Files: Exports Rocksmith XML for creating custom charts.
- Save Separate Rocksmith 2 Files: Exports Rocksmith 2014 XML with additional features.
- Save Separate Bandfuse Files: Exports XML for Bandfuse charts.
- Save FoF/GH/Phase Shift Files: Exports files for Frets On Fire, Guitar Hero, and Phase Shift.
Refer to the Preferences Manual for additional options.
Common Problems
Common Problems
Problem:
EOF hangs intermittently.
Solution:
Disable the "Use software cursor" option in File > Display > Display.
Problem:
The mouse doesn't appear very responsive, especially to small movements, and changing the "Use Software Cursor" setting doesn't help.
Solution:
Some high-end mice (e.g., Logitech G500) may have compatibility issues with Allegro. Try the following:
- Use the mouse's management utility to lower the polling rate.
- Disable the "Enhance pointer precision" option in Windows mouse settings.
- If these steps don't work, consider using a basic mouse.
Problem:
EOF doesn't play any sound and shows no errors.
Solution:
Some sound driver settings might not work with Allegro. For example:
- If your sound card uses EAX emulation (e.g., "GX Mode" on Xonar cards), disable the feature.
Thanks to fatdog for this fix.
Problem:
Notes are out of sync when playing the song in Frets On Fire (FOF).
Solution:
Set up the AV delay properly:
- Open the "AV Delay" song.
- Start the song and observe if notes light up before or after the sound. Adjust using
-or+keys. - Ensure your AV delay is also configured in FOF. Test with a perfectly synced song and adjust the AV delay until it matches.
Problem:
Music playback stutters or cracks.
Solution:
Adjust the buffer size:
- Go to File > Settings.
- Increase the buffer size (e.g., from 4096 to 8192 or higher).
- If the issue improves but persists, increase the size further.
- Note: After adjusting the buffer size, you must reset the AV delay.
Problem:
During playback, the position marker moves too fast initially before slowing to normal speed.
Solution:
This occurs due to the way OGG files are played. Rewind slightly further to ensure the marker syncs correctly when reaching the notes or beats.
Problem:
Key presses don't work in EOF, even though they work in other programs.
Solution:
Key inputs might be intercepted by other software, such as:
- "Microsoft eHome Infrared Transceiver" driver.
- Synergy (mouse/keyboard sharing software).
Disable or uninstall the conflicting software.
Problem:
Notes should play as HOPOs but don't in FOF/Phase Shift.
Solution:
This could happen if the notes are too far apart due to rounding errors. Fix this by:
- Select the notes.
- Use a high grid snap value (e.g., 1/48).
- Use Note > Resnap to re-align notes.
Avoid resnapping notes that are intentionally not grid-snapped.
Problem:
FOF/FoFiX/Magma doesn't work with the notes.mid file created by EOF.
Solution:
FOF/FoFiX has a bug with MIDI files containing Sysex events. These events mark features like pro guitar slides, open strum notes, etc. To work around this:
- Avoid using features requiring Sysex events.
- Enable the "Save Separate RBN MIDI files" preference and use
notes_rbn.mid(rename it tonotes.mid).
Problem:
EOF gives errors when trying to save a chart.
Solution:
Possible causes:
- Files are locked by other programs (e.g., FOF/Phase Shift). Exit those programs.
- You don't have write permission to the save directory. Save to a location with unrestricted access (e.g., Desktop).
- Files/folders are marked as hidden or ready to archive. Remove these attributes in file properties.
Problem:
Accented characters are replaced with ^ during lyric import.
Solution:
EOF's lyric import may not handle some text file encodings (e.g., Windows 1252). To fix this:
- Open the lyric file in a text editor that supports encoding selection (e.g., EditPad Lite).
- Change the encoding to UTF-8 (without BOM).
- Save the file and re-import it into EOF.
Problem:
The mouse pointer doesn't work reliably in EOF but works in other programs.
Solution:
High-resolution mice may not work well with Allegro. Reduce the mouse's DPI settings using its configuration utility (e.g., SetPoint for Logitech mice).
Problem:
Features like adding leading silence or exporting lyrics don't work when using EOF in a virtual Windows environment (e.g., Parallels on Mac).
Solution:
Ensure EOF and project files are on the Windows installation's file system, not the Mac file system.
Problem:
In Windows 8, EOF takes up the full screen, and the mouse doesn't work.
Solution:
Windows 8 may allow EOF to set a window size larger than the screen resolution. To fix this:
- Set EOF's resolution to 640x480 using keyboard controls.
- If that fails, edit
eof.cfgin EOF's folder and delete thedisplay_modeandeof_screen_widthlines under[display]. Alternatively, delete the entireeof.cfgfile to reset settings.
Problem:
EOF is laggy, and input is missed.
Solution:
Programs like nVidia's GSync may interfere with non-games. Configure GSync to only apply to full-screen programs to avoid issues with EOF.
Notes panel macros
Article Content
13 sections Section of 13
What is this?
The Notes panel is an additional informational panel that is meant for users to customize to display whatever information is wanted. This is achieved by defining static text as well as various macros that will translate dynamically to text. For the sake of this documentation, "printed" text will refer to the text that is written to the Notes panel. Some of these macros are conditional, so you can control whether text or macros are displayed at all, such as to define content that will display only for the vocal track, or for content that will only display if a note is currently selected. Content is defined line by line, where one line in the text file corresponds to a single line in the Notes panel. Macros are case insensitive (you can use any amount of upper or lower case letters to type them), but it's recommended to use upper case to make it more easy to identify where macros occur int the notes.panel.txt file. It's also generally more traditional to type macros in all capital letters.
Using the Notes panel
A default notes.panel.txt file is provided with EOF. It is a simple text file which can be viewed or edited in a text editor such as the Notepad utility that comes with Windows. Keep in mind that this file is expected to be written in Windows format: Line breaks are CR LF format (a carriage return character followed by a line feed character). Decent text editors should allow you to save edits in this format, just make sure it isn't converted to Linux (line breaks only have a line feed character) or Unix (line breaks only have a carraige return character) format or it won't work properly. To display or hide the Notes panel, use the File>Display>Enable Notes panel function. If it is shown, EOF will automatically resize the program window if doing so is needed to make enough space to display the panel. If the Info panel or 3D preview are already being hidden (ie. from File>Preferences>Preferences), EOF will use that empty space for the Notes panel and will prompt to resize the program window if the disabled Info/3D panels are re-enabled from Preferences while the Notes panel is being displayed (or if the Info panel is re-enabled via keyboard shortcut, EOF will resize the program window without prompting). The Notes panel's contents are kept in EOF's memory to avoid having to read it from the computer's hard drive repeatedly, so if you make edits to the Notes panel, you can make them take effect in EOF by hiding the Notes panel and showing it again. This causes EOF to re-load the notes.panel.txt file into memory. Keep in mind that text that runs over the right edge of the Notes Window and into the 3D preview or the edge of the program window unless you either hide the 3D preview window or resize the program window (File>Display>Set display width).
Printing static text
The simplest thing to display would be static text, which prints exactly as typed in the notes.panel.txt file. Alphabetical characters, numerical characters and spaces are supported. Other characters aren't guaranteed to work. Control characters like the tab character, for example, do not display. Static text is mostly useful to display notes, to-do items, keyboard shortcuts, etc.
Printing dynamic text
Dynamic text is text that will change due to various defined conditions such as whether notes are selected, what kind of track is being displayed in the editor, etc. For the Notes panel, this is achieved by using a "macro", which is basically a placeholder for what will eventually be "printed" to the Notes panel. You can use this to display statuses of notes, conditions that may be in effect and other pieces of information. EOF's macros always begin with a % (percent sign), end with % and never include any spaces. If you want to print a percent sign to the Notes panel, a %PERCENT% macro can be used. If there is an error in the notes.panel.txt file, the notes panel will indicate there was an unrecognized macro in that line. If the unrecognized macro is specified as being %ELSE%, it's probably an error that needs to be corrected in EOF, otherwise it's most likely a typo in the notes.panel.txt file or a macro is being used that isn't supported by the version of EOF that you're using. A complete list of all macros that EOF supports are defined further down in this document. Feel free to request new macros to print specific items, which can be added to EOF if they would be useful or at least reasonably simple to implement.
Comments
Any line in notes.panel.txt that begins with a semicolon ; will be treated as a comment and no text or macros will be processed for that line. No blank line will be printed, even if there is an %EMPTY% macro in the line.
Conditional macros
There are times where you may want to only display a certain piece of content under certain conditions. For example, say you only wanted to print the shortcuts for toggling cymbal status when the drum track was active. You could do this by adding the following text to the notes.panel.txt file:
**%IF_IS_DRUM_TRACK%**Toggle Y/B/G cymbal: CTRL+Y/B/G Expert+ bass: CTRL+E
Everything after the %IF_IS_DRUM_TRACK% will only print if that macro's condition is true: That a drum track (either the normal one or the Phase Shift drum track) is the active track. This way, you can display the shortcuts only when relevant and when a non drum track is active, that space can be used to display something else. You can consider the part of the line that will print when the macro is evaluated as true as being the macro's "scope", which in this case is everything after the %IF_IS_DRUM_TRACK% macro up until the end of the line.
In the previous example, everything after the %IF_IS_DRUM_TRACK% macro up until the end of the line in the notes.panel.txt file was conditional on the active track being a drum track and thus the macro being evaluated as being true. A more complicated example is one where only part of a line is conditional. An %ENDIF% macro can be placed after an %IF... macro to end its scope, stopping the conditional processing of the line in the notes.panel.txt file. For example:
**%IF_NOTE_IS_SELECTED%**Note is selected at %SELECTED_NOTE_POS%. **%ENDIF%**Seek position is %SEEK_POSITION%.
In this example, the "Note is selected at (position)" text is only printed if a note is selected. The %ENDIF% macro indicates the end of the content that only prints if a note is selected, so the seek position is displayed regardless of whether a note is selected. After conditional printing of a line is ended with %ENDIF%, another conditional macro can be used if desired. For example:
**%IF_NOTE_IS_SELECTED%**Note selected. **%ENDIF%**Seek position is %SEEK_POSITION%. **%IF_NOTE_IS_SELECTED%**Selected note is at %SELECTED_NOTE_POS%.
In this example. "Note selected." only prints if a note is selected. Then the seek position is printed regardless of whether a note is selected. Then the selected note's position is printed only if a note is selected. Keep in mind that some macros are only relevant in some conditions. If the %SELECTED_NOTE_POS% macro is printed when no note is selected, the text "None" would be printed, and that might not always be what you want. Conditionally printing such macros can be preferable if that's the result you're wanting to achieve.
An even more complicated use of conditional macros is printing text when the conditional macro evaluates as false. Similarly to %ENDIF%, the %ELSE% macro ends the scope of a conditional macro that evaluated as true. However, everything in the scope of the %ELSE% macro is printed only if the previous conditional macro evaluated as false. For example:
%COUNT_NOTES_SELECTED% %IF_IS_VOCAL_TRACK%Lyrics%ELSE%Notes%ENDIF% are selected.
In this example, the number of notes/lyrics that are selected is printed, followed by a space. Then if the vocal track is active, the text "Lyrics" is printed. The %ELSE% macro defines what to print if the %IF_IS_VOCAL_TRACK% condition was not true, so the text "Notes" is printed if the vocal track is not active. As with previous examples, %ENDIF% ends the scope of the %ELSE% macro and defines where the true/false conditional printing stops and normal printing resumes, so the text " are selected." is then printed no matter which track is active. Keep in mind that the printing of spaces can also be conditional, so place them either inside or outside conditional macro statements as appropriate.
The most complex use of conditional macros is when a conditional macro is used inside the scope of another conditional macro. This is known as "nesting" the conditional macros. For example:
**%IF_IS_VOCAL_TRACK%****%IF_NOTE_IS_SELECTED%At least one lyric is selected.%ELSE%**No lyrics are selected.
In this example, the first if macro is evaluated, and then only if it is true, the second if macro (which is nested one "level" deeper) is evaluated. So if a vocal track is active, text will be printed indicating whether or not any lyrics are selected. If a vocal track is not active, nothing is printed. You can generally nest conditional macros as many levels as you want, just make sure to use the correct number and placement of %ENDIF% and %ELSE% macros to control the scope to get the desired results. If you wanted to print text after the previous example even if the vocal track was not active, the scope of both conditional macros would have to be ended. For example:
**%IF_IS_VOCAL_TRACK%%IF_NOTE_IS_SELECTED%**At least one lyric is selected. **%ELSE%**No lyrics are selected. **%ENDIF%%ENDIF%**This text always prints.
The first %ENDIF% macro ended the scope of %IF_NOTE_IS_SELECTED% that occurred immediately before it, and the second %ENDIF% macro ended the scope of the %IF_IS_VOCAL_TRACK% macro even earlier. Ultimately, "This text always prints." will be printed regardless of whether any lyrics are selected or whether the vocal track is even active.
Printing empty lines
If a defined line is empty or if all of the macros are conditional and none of the applicable requirements are met, nothing will display for it in the Notes panel, not even an empty line. The text output position in the Notes panel will not advance, meaning the next line of content will be displayed immediately below the previous line of content that was written. For example:
**%IF_IS_VOCAL_TRACK%**This is a vocal track
This is the next line
If the current track is the vocal track, two lines will be written to the Notes panel ("This is a vocal track" and "This is the next line"), otherwise only the second of those two lines will be written and there will be no empty line.
If you want to allow a line that results in no text (due to either being empty in the notes.panel.txt file or by no conditions being successfully met) to be written as an empty line in the Notes panel, use an %EMPTY% macro anywhere it will be sure to be processed instead of being within the scope of a macro that might not be used (before conditional macros or after all conditional macros were ended with %ENDIF%. If you change it as follows:
%IF_IS_VOCAL_TRACK%This is a vocal track%ENDIF%****%EMPTY%
This is the next line
Everything from the %IF_IS_VOCAL_TRACK% macro until the end of the line in the notes.panel.txt file will only be processed if that condition (the current track is the vocal track) is met, or until an %ELSE% or %ENDIF% macro is reached on the same line. Using %ENDIF% in this example allows the rest of the line to be processed so if the current track is NOT the vocal track, the %EMPTY% macro is still processed. Since no text is being written for this line (none of it pertained to non vocal tracks), nothing is to be written for this line in the Notes panel, and the %EMPTY% macro that was processed indicates that the line is explicitly written to be empty in the panel so that the next text to be written to the panel will do so after a blank row.
Macro list
These are all of the macros that can be used with the Notes panel.
Tip: Some web browsers will allow you to hold CTRL and left click on the macro name to highlight the entire name. This makes it easier to copy to the clipboard and paste into the notes.panel.txt file in order to change what is to be displayed in the Notes panel. CTRL+click the macro name again or click someplace else on the page in order to deselect it.
Conditional macros
See the detailed explanation earlier in this document for instructions on how to use conditional macros.
Macro name
Purpose
%IF_HOVER_BEAT%
Evaluates as true if the mouse is currently hovering over a beat marker.
%IF_SELECTED_BEAT_HAS_TS%
Evaluates as true if there is a time signature in effect at the selected beat (a time signature change is placed at or before the selected beat).
%IF_IS_VOCAL_TRACK%
Evaluates as true if the active track is the vocal track.
%IF_IS_NOT_VOCAL_TRACK%
Evaluates as true if the active track is NOT the vocal track.
%IF_IS_LEGACY_GUITAR_TRACK%
Evaluates as true if the active track is a guitar track that is not a pro guitar track.
%IF_IS_NOT_LEGACY_GUITAR_TRACK%
Evaluates as true if the active track is anything but a legacy guitar track (a pro guitar track, a drum track, the keys track, the dance track or the vocal track).
%IF_IS_PRO_GUITAR_TRACK%
Evaluates as true if the active track is a pro guitar track.
%IF_IS_NOT_PRO_GUITAR_TRACK%
Evaluates as true if the active track is NOT a pro guitar track.
%IF_IS_DRUM_TRACK%
Evaluates as true if the active track is either of the drum tracks: The normal one (PART DRUMS) or the Phase Shift one (PART REAL_DRUMS_PS).
%IF_IS_NOT_DRUM_TRACK%
Evaluates as true if the active track is NOT one of the drum tracks.
%IF_IS_GHL_TRACK%
Evaluates as true if the active track has GHL mode enabled.
%IF_IS_NOT_GHL_TRACK%
Evaluates as true if the active track does NOT have GHL mode enabled, regardless of whether or not GHL mode is compatible with the active track.
%IF_IS_FIVE_BUTTON_GUITAR_TRACK%
Evaluates as true if the active track is one designed for use with a five button guitar controller (not a GHL mode guitar track and is not a pro guitar track).
%IF_IS_NON_FIVE_BUTTON_GUITAR_TRACK%
Evaluates as true if the active track is one designed for use with one designed for use with a guitar controller with more than five buttons (a GHL mode guitar track or a pro guitar track).
%IF_IS_FIVE_BUTTON_GUITAR_OR_KEYS_TRACK%
Evaluates as true if the active track is one designed for use with a five button guitar controller (not a GHL mode guitar track and is not a pro guitar track), or is the keys track (which has similar functionality being a 5 lane track).
%IF_IS_ANY_GUITAR_TRACK%
Evaluates as true if the active track is a guitar/bass track of any kind (normal, GHL, pro guitar).
%IF_IS_NOT_ANY_GUITAR_TRACK%
Evaluates as true if the active track is anything besides a guitar/bass track.
%IF_IS_DANCE_TRACK%
Evaluates as true if the active track is the dance track.
%IF_IS_NOT_DANCE_TRACK%
Evaluates as true if the active track is NOT the dance track.
%IF_IS_KEYS_TRACK%
Evaluates as true if the active track is the keys track.
%IF_IS_NOT_KEYS_TRACK%
Evaluates as true if the active track is NOT the keys track.
%IF_IS_TECH_VIEW%
Evaluates as true if the active track is a pro guitar track AND tech view is in effect.
%IF_IS_NOT_TECH_VIEW%
Evaluates as true if tech view is NOT in effect. This will always evaluate as true if the active track is not a pro guitar track.
%IF_NOTE_IS_SELECTED%
Evaluates as true if a note is specifically selected by mouse click. Using select functions does not count towards this condition.
%IF_SELECTED_NOTES%
Evaluates as true if at least one note is currently selected by any means (even without clicking on notes with the mouse).
%IF_HOVER_NOTE%
Evaluates as true if the mouse is currently hovered over a note.
%IF_SEEK_HOVER_NOTE%
Evaluates as true if Feedback input mode is in effect AND there is a note at the current seek position (making it the target for various modifications such as toggling gems, deletion, etc).
%IF_SELECTED_NOTE_IS_NAMED%
Evaluates as true if a note is currently selected AND that note has been given a name (ie. by Note>Edit Name).
%IF_CAN_LOOKUP_SELECTED_CHORD_NAME%
Evaluates as true if the active track is a pro guitar track, a chord is selected and the chord lookup logic found a name for it.
%IF_TUNING_IGNORED%
Evaluates as true if the active track is a pro guitar track, and its Track>Pro Guitar>Ignore tuning/capo option is enabled.
%IF_SOUND_CUES_DISABLED%
Evaluates as true if the "Disable sound FX" preference is enabled.
%IF_START_POINT_DEFINED%
Evaluates as true if the start point (see Edit>Set start point) has been defined.
%IF_END_POINT_DEFINED%
Evaluates as true if the end point (see Edit>Set start point) has been defined.
%IF_SELECTED_CATALOG_ENTRY_NAMED%
Evaluates as true if there is a fret catalog entry, and the currently selected catalog entry has a name defined for it (see Song>Catalog).
%IF_WINDOW_HEIGHT_IS_480%
Evaluates as true if the EOF's window height (set in File>Display>Display) is 480.
%IF_WINDOW_HEIGHT_IS_600%
Evaluates as true if the EOF's window height (set in File>Display>Display) is 600.
%IF_WINDOW_HEIGHT_IS_768%
Evaluates as true if the EOF's window height (set in File>Display>Display) is 768.
%IF_ACTIVE_DIFFICULTY_IS_NUMBER_[NUMBER]%
Evaluates as true if the active difficulty number matches [NUMBER], where the lowest difficulty (ie. "Easy" in Rock Band terms) is 0 and the highest difficulty supported for Rocksmith authoring is 255.
%IF_ACTIVE_DIFFICULTY_IS_EASY%
Evaluates as true if the active difficulty is "Easy" by Rock Band standards ("Supaeasy" in Frets on Fire).
%IF_ACTIVE_DIFFICULTY_IS_MEDIUM%
Evaluates as true if the active difficulty is "Medium" by Rock Band standards ("Easy" in Frets on Fire).
%IF_ACTIVE_DIFFICULTY_IS_HARD%
Evaluates as true if the active difficulty is "Hard" by Rock Band standards ("Medium" in Frets on Fire).
%IF_ACTIVE_DIFFICULTY_IS_EXPERT%
Evaluates as true if the active difficulty is "Expert" by Rock Band standards ("Amazing" in Frets on Fire).
%IF_ACTIVE_DIFFICULTY_HAS_EMPTY_SOLO%
Evaluates as true if the active difficulty has any solo sections that don't have at least one note, even if the solos have notes in other difficulties. This condition may prevent the chart from working in Clone Hero.
%IF_ACTIVE_DIFFICULTY_HAS_NO_CYMBALS%
Evaluates as true if the active difficulty doesn't have at least one cymbal.
%IF_ANY_SOLOS_CLOSER_THAN_1_SECOND%
Evaluates as true if any solo sections begin less than one second after an earlier one. This condition may prevent the solo bonus from displaying long enough to be visible in Clone Hero.
%IF_TRACK_DIFF_HAS_NOTES_WITH_GEM_COUNT_[NUMBER]%
Evaluates as true if the active track difficulty has at least one note with the specified [NUMBER] of gems. Specify 0 to check for open strum notes. This can be used to quality check a chart by looking for the presence of 4 or 5 lane chords.
%IF_TRACK_DIFF_HAS_INVALID_DRUM_CHORDS%
Evaluates as true if the drum track is active and the active difficulty has at least one chord that is unplayable in a Rock Band style game (which has no support for mechanisms like hi hat pedals) in that it requires more than two hands to play.
%IF_NONZERO_MIDI_DELAY%
Evaluates as true if chart has a nonzero delay/offset, which isn't supported in some rhythm games like Clone Hero and Rock Band.
%IF_TRACK_HAS_NO_SOLOS%
Evaluates as true if the active track does not have any solo sections.
%IF_TRACK_HAS_NO_STAR_POWER%
Evaluates as true if the active track does not have any star power sections.
%IF_TRACK_HAS_NO_SLIDERS%
Evaluates as true if the active track does not have any slider sections.
%IF_TRACK_HAS_NO_EXPERT_PLUS_BASS%
Evaluates as true if the active track doesn't have at least one expert+ bass note.
%IF_TRACK_DIFFICULTY_UNDEFINED%
Evaluates as true if the active track's difficulty is not defined. This doesn't take the secondary difficulty level (vocal and drum tracks) into account.
%IF_ANY_TRACK_DIFFICULTY_UNDEFINED%
Evaluates as true if any populated track has no defined difficulty. This doesn't take the secondary difficulty level (vocal and drum tracks) into account.
%IF_TRACK_IS_POPULATED%
Evaluates as true if the active track has any normal or tech notes.
%IF_NO_LOADING_TEXT%
Evaluates as true if the project has no loading text defined or the text that is defined is just whitespace.
%IF_NO_PREVIEW_START_TIME%
Evaluates as true if the project has no preview start time INI entry defined either manually or by using Song>Create preview audio.
%IF_NOTE_GAP_IS_IN_MS%
Evaluates as true if EOF's configured Min. note distance setting (analogous to the note gap setting in Moonscraper) in File>Preferences>Preferences is set to # ms instead of a 1/# beat or measure interval as is typically recommended for Clone Hero authoring.
%IF_CH_SP_TS_MISSING%
Evaluates as true if star power scoring information can't be determined due to the first beat marker having no time signature.
%IF_CH_SP_TS_DEFINED%
Evaluates as true if the first beat marker has a defined time signature.
%IF_CH_SP_PATH_VALID%
Evaluates as true if a star power path is defined (either automatically with "Track>Find optimal CH star power path" or manually with "Note>Clone Hero>SP deploy") and it is valid.
%IF_CH_SP_DEPLOYMENTS_MISSING%
Evaluates as true if no star power deployments are defined.
%IF_CH_SP_PATH_INVALID%
Evaluates as true if one or more star power deployments are defined but it is considered an invalid star power path, such as if a deployment is designated without sufficient star power, deploying while star power is already deployed, etc.
%IF_CH_SP_STATS_AVAILABLE%
Evaluates as true if star power related information is available (the star power pathing logic calculated a score) to be displayed by applicable expansion macros.
%IF_GRID_SNAP_ENABLED%
Evaluates as true as long as grid snap isn't set to off.
Control macros
These macros are for special uses, such as affecting how text will be printed to the Notes panel.
Macro name
Purpose
%EMPTY%
If the line in notes.panel.txt did not result in any text to print for the line in the Notes panel, this macro allows an empty line to be printed to the Notes panel and the print position to be lowered so that the next line of printed text occurs below the empty space.
%MOVE_UP_ONE_PIXEL%
Raises the print position in the Notes panel by one pixel, to remove spacing, such as if you want to use hyphens to underline the previous printed line of text.
%MOVE_UP_PIXELS_[NUMBER]%
Raises the print position in the Notes panel by [NUMBER] pixels, to remove spacing, such as if you want to use hyphens to underline the previous printed line of text.
%MOVE_DOWN_ONE_PIXEL%
Lowers the print position in the Notes panel by one pixel, to allow better spacing in case two lines of printed text are too close and overlap each other.
%MOVE_DOWN_PIXELS_[NUMBER]%
Lowers the print position in the Notes panel by [NUMBER] pixels, to remove spacing, such as if you want to use hyphens to underline the previous printed line of text.
%MOVE_LEFT_ONE_PIXEL%
Moves the print position in the Notes panel left by one pixel, such as to allow better alignment of items in different lines.
%MOVE_LEFT_PIXELS_[NUMBER]%
Moves the print position in the Notes panel left by [NUMBER] pixels, such as to allow better alignment of items in different lines.
%MOVE_RIGHT_ONE_PIXEL%
Moves the print position in the Notes panel right by one pixel, such as to allow better alignment of items in different lines.
%MOVE_RIGHT_PIXELS_[NUMBER]%
Moves the print position in the Notes panel right by [NUMBER] pixels, such as to allow better alignment of items in different lines.
%FLUSH%
Prints the content of the line that has been processed up to this point, then resumes processing the line. Use this to print a line in progress so that a control macro that comes after the %FLUSH% statement, such as %TEXT_COLOR_[COLORNAME]%, can take effect mid-line.
%TEXT_COLOR_[COLORNAME]%
Changes the text color of newly printed text to [COLORNAME], which can be BLACK, WHITE, GRAY, RED, GREEN, BLUE, TURQUOISE, YELLOW, PURPLE, ORANGE, SILVER, CYAN or a 6 digit RGB code. For example: %TEXT_COLOR_RED% and %TEXT_COLOR_DAA520%. This color change is permanent until it is changed again.
%TEXT_BACKGROUND_COLOR_[COLORNAME]%
Similar to the %TEXT_COLOR_...% macro, changes the background color of newly printed text to [COLORNAME]. This color change is permanent until it is changed again. The default background color can be restored with %TEXT_BACKGROUND_COLOR_NONE%.
%TEXT_BACKGROUND_COLOR_NONE%
Removes the text background color, making it transparent as it is by default.
%ENDLINE%
Ends printing for the current line.
%ENDPANEL%
Ends printing for the entire panel.
Symbol macros
These macros each result in a single symbol being printed to the Notes panel.
Macro name
Purpose
%PERCENT%
Prints the percent sign. This is the only way to print a percent sign because percent signs are otherwise used to name macros.
%BEND%
Prints the bend symbol.
%HARMONIC%
Prints the harmonic symbol.
%DOWNSTRUM%
Prints the down strum symbol.
%UPSTRUM%
Prints the up strum symbol.
%TREMOLO%
Prints the tremolo symbol.
%PHARMONIC%
Prints the pinch harmonic symbol.
%LINKNEXT%
Prints the linknext symbol.
%USLIDEUP%
Prints the unpitched slide up symbol.
%USLIDEDOWN%
Prints the unpitched slide down symbol.
%STOP%
Prints the stop symbol.
%PREBEND%
Prints the pre-bend symbol.
Expansion macros
These macros are "expanded" into (replaced with) appropriate text which is printed to the Notes panel.
Macro name
Purpose
Track information
%TRACK_NAME%
Prints the name of the active track (ie. PART GUITAR).
%TRACK_ALT_NAME%
Prints the alternate name of the active track (the name that was defined with Track>Rename). If no such name is defined for the active track, "None" is printed.
%TRACK_DIFFICULTY%
Prints the difficulty level of the active track (which is set in Track>Set difficulty). If no difficulty is defined for the active track, "(Undefined)" is printed.
%TRACK_SECONDARY_DIFFICULTY%
If the active track is one of the tracks that has a second difficulty level (drums or vocals, see Track>Set difficulty), prints that level along with some text identifying what the difficulty type ("(Pro: " for pro drum difficulty or "(Harmony: " for harmony difficulty). If the active drum/vocal track has no secondary difficulty level defined, "Undefined" is printed after the dificulty type. If the active track is not a drum/vocal track, no text is printed.
%TRACK_SOLO_COUNT%
Prints the number of solo sections in the active track. If there aren't any, "None" is printed.
%TRACK_SOLO_NOTE_COUNT%
Prints the number of notes in the active track that are in solo sections, and the percentage of the track's total note count that represents. If there aren't any, "None" is printed.
%TRACK_SOLO_NOTE_STATS%
Prints statistics about the number of notes in the active track's solo sections: The minimum number among all solo sections, the maximum number among all solo sections and the mean number (the total number of solo notes divided by the number of solo sections). If there aren't any, "None" is printed.
%TRACK_SP_COUNT%
Prints the number of star power sections in the active track. If there aren't any, "None" is printed.
%TRACK_SP_NOTE_COUNT%
Prints the number of star power notes in the active track, and the percentage of the track's total note count that represents. If there aren't any, "None" is printed.
%SP_LYRIC_LINE_COUNT%
Prints the number of star power lyric lines in the vocal track, and the percentage of the vocal track's total lyric line count that represents. If there aren't any, "None" is printed.
%TRACK_SP_NOTE_STATS%
Prints statistics about the number of notes in the active track's star power sections: The minimum number among all star power sections, the maximum number among all star power sections and the mean number (the total number of star power notes divided by the number of star power sections). If there aren't any, "None" is printed.
%TRACK_SLIDER_COUNT%
Prints the number of slider sections in the active track. If there aren't any, "None" is printed.
%TRACK_SLIDER_NOTE_COUNT%
Prints the number of slider notes in the active track, and the percentage of the track's total note count that represents. If there aren't any, "None" is printed.
%TRACK_SLIDER_NOTE_STATS%
Prints statistics about the number of notes in the active track's slider sections: The minimum number among all slider sections, the maximum number among all slider sections and the mean number (the total number of slider notes divided by the number of slider sections). If there aren't any, "None" is printed.
Sound cue statuses
%METRONOME_STATUS%
Prints "On" if the metronome sound cue (see Edit>Metronome) is currently enabled, otherwise prints "Off".
%CLAPS_STATUS%
Prints "On" if the claps sound cue (see Edit>Claps) is currently enabled, otherwise prints "Off".
%VOCAL_TONES_STATUS%
Prints "On" if the vocal tones sound cue (see Edit>Vocal tones) is currently enabled, otherwise prints "Off".
%MIDI_TONES_STATUS%
Prints "On" if the MIDI tones sound cue (see Edit>MIDI tones) is currently enabled, otherwise prints "Off".
Beat information
%SELECTED_BEAT%
Prints the selected beat's number. The first beat in a project is always number 0.
%SELECTED_BEAT_TEMPO%
Prints the tempo of the selected beat. Only the number is printed, you must add the text "BPM" if that is what you want.
%HOVER_BEAT%
Prints the number of the beat that the mouse is currently hovering over. If no beat is being hovered over, "None" is printed.
%SELECTED_BEAT_KEY_SIGNATURE%
Prints the major key signature defined on the selected beat, followed by the minor key signature in parentheses. If no key signature is defined on the selected beat, "None maj (None min)" is printed.
%SELECTED_BEAT_POS%
Prints the position of the selected beat.
%SELECTED_BEAT_MEASURE%
Prints the measure number the selected beat is in. If no time signature is in effect at the selected beat's position (Beat>Time signature was not used to define a time signature on that or any previous beat), "(TS undefined)" is printed.
%BEAT_POSITION_IN_MEASURE%
Prints the beat number within a measure the selected beat is. If no time signature is in effect at the selected beat's position (Beat>Time signature was not used to define a time signature on that or any previous beat), "(TS undefined)" is printed.
%BEAT_COUNT%
Prints the number of beats present in the current project.
%MEASURE_COUNT%
Prints the number of measures present in the current project. If there are no time signatures defined in the project, "(No TS)" is printed.
Selected Note information
%SELECTED_NOTE%
Prints the selected note's/beat's number. The first note in a track is always number 0, but the numbering is shared among all difficulties in the track, so the first note in a difficulty will not be 0 if there's an earlier note in another difficulty in the same track. If no note is selected, "None" is printed.
%SELECTED_NOTE_POS%
Prints the position of the selected note. If no note is selected, "None" is printed.
%SELECTED_NOTE_LENGTH%
Prints the length of the selected note. If no note is selected, "None" is printed.
%SELECTED_NOTE_NAME%
Prints the name (ie. defined by Note>Edit Name) of the selected note. If the selected note has no defined name, no text is printed. If no note is selected, "None" is printed.
%SELECTED_NOTE_VALUE%
Prints the internal note value of the selected note. If the active track is the vocal track, this value is the pitch of the selected lyric. If the active track is not a vocal track, this is a bitmask defining which lanes the note uses. If no note is selected, "None" is printed.
%SELECTED_NOTE_FLAGS%
Prints the internal flags value of the selected note/lyric. If no note/lyric is selected, "None" is printed.
%SELECTED_LYRIC_TONE_NAME%
Prints the proper note name for the pitch, ie. C# or Db (taking the Song>Display semitones as flat setting into account). If no lyric is selected, or the active track is not the vocal track, "None" is printed.
%PRO_GUITAR_NOTE_FRETTING%
Prints a string defining the fret number used on each string by the selected pro guitar note. If no note is selected or the active track is not a pro guitar track, "None" is printed.
%SELECTED_CHORD_NAME_LOOKUP%
Prints a string indicating what chord name the selected note is detected to have, and what match number out of the total number of lookup matches the result is. If no note is selected, or there are no chord name matches found or the active track is not a pro guitar track, "None" is printed.
%PRO_GUITAR_NOTE_FINGERING%
Prints a string defining the finger number used on each string by the selected pro guitar note (see Note>Rocksmith>Edit frets/fingering). If no note is selected, or the active track is not a pro guitar track, "None" is printed.
%PRO_GUITAR_NOTE_TONES%
Prints a string defining the note name played on each string by the selected pro guitar note. If no note is selected or the active track is not a pro guitar track, "None" is printed.
Note information
%HOVER_NOTE%
Prints the number of the note that the mouse is currently hovering over. If no note is being hovered over, "None" is printed.
%SEEK_HOVER_NOTE%
Prints the number of the note that is at the seek position and would be altered by various modifications in Feedback input mode. If Feedback input mode is not in use or if the seek position is not at a note position, "None" is printed.
%COUNT_NOTES_SELECTED%
Prints the number of selected notes that are in the active track difficulty.
%TRACK_DIFF_NOTE_COUNT%
Prints the number of notes that exist in the active track difficulty.
%TRACK_DIFF_NUMBER_NOTES_WITH_GEM_COUNT_[NUMBER]%
Prints the number of notes in the track difficulty that have the specified [NUMBER] of gems, and the percentage of the track difficulty's total note count that represents. Specify 0 to print information for open strum notes.
%TRACK_DIFF_NOTE_COUNT_INSTANCES_[COMBINATION]%
Prints the number of notes in the track difficulty that have the specified [COMBINATION] of gems. Standard GRYBO gem colors can be specified (G is lane 1, R is lane 2, Y is lane 3, B is lane 4, O is lane 5, ie. %TRACK_DIFF_NOTE_COUNT_INSTANCES_GR% counts green+red chords), and S is for open strum. For pro guitar tracks, 'P' can be used to represent lane 6 (lane 6 gems are drawn in purple for Rock Band, Guitar Hero and Rocksmith color sets). For GHL tracks, the gem designations are W1, W2, W3, B1, B2, B3 and S for open strum. For drum tracks, cymbals/toms that must be present to be counted are available: "T3" = lane 3 tom, "T4" = lane 4 tom, "T5" = lane 5 tom, "C3" = lane 3 cymbal, "C4" = lane 4 cymbal, "C5" = lane 5 cymbal. These tom/cymbal designations are additive, ie. a designation of 3T5 will be specify any drum chord with a cymbal or tom on lane 3 and a tom on lane 5, and 3C3 will have the same result as C3 because both indicate a note where there must be cymbal on lane 3, which requires there to be a gem on lane 3. Lane numbers can also be designated by number instead of color ('1' is lane 1, '2' is lane 2, '3' is lane 3, '4' is lane 4, '5' is lane 5, '6' is lane 6). A pro guitar note being an open note doesn't prevent it from being detected as having gems on lanes, ie. an open E single note will be counted by both %TRACK_DIFF_NOTE_COUNT_INSTANCES_S% and %TRACK_DIFF_NOTE_COUNT_INSTANCES_1%.
%TRACK_DIFF_NOTE_COUNT_AND_RATIO_INSTANCES_[COMBINATION]%
Similar to %TRACK_DIFF_NOTE_COUNT_INSTANCES_[COMBINATION]%, but also prints the percentage of all notes in the active track difficulty that matching notes represent.
%TRACK_DIFF_COUNT_AND_RATIO_OPEN_CHORDS%
Prints the number of open chords (chords with at least one open string, at least one fretted string, and no frets higher than 3) in the active pro guitar track difficulty, and the percentage of the track difficulty's total note count that represents. If the active track is not a pro guitar track, "None" is printed.
%TRACK_DIFF_COUNT_AND_RATIO_BARRE_CHORDS%
Prints the number of barre chords (chords where the lowest used fret is played on multiple non-contiguous strings, with no strings played open between the lowest fret instances) in the active pro guitar track difficulty, and the percentage of the track difficulty's total note count that represents. If the active track is not a pro guitar track, "None" is printed.
%TRACK_DIFF_COUNT_AND_RATIO_STRING_MUTES%
Prints the number of fully string muted chords in the active pro guitar track difficulty, and the percentage of the track difficulty's total note count that represents. If the active track is not a pro guitar track, "None" is printed.
%TRACK_DIFF_NOTE_COUNT_AND_RATIO_EXPERT_PLUS_BASS%
Prints the number of expert+ bass notes in the active track difficulty, and the percentage of the track difficulty's total note count that represents. If the active track difficulty is not Expert in either of the drum tracks, "None" is printed.
%TRACK_DIFF_NOTE_COUNT_AND_RATIO_CYMBALS%
Prints the number of notes with cymbals in the active track difficulty, and the percentage of the track difficulty's total note count that represents. If the active track difficulty doesn't have any cymbals, "None" is printed.
%TRACK_DIFF_COUNT_AND_RATIO_PITCHED_LYRIC%
Prints the number of pitched lyrics (lyrics with a pitch between 36 and 84 whose text does not include a freestyle marker), and the percentage of the track difficulty's total note count that represents. If the vocal track is not active, "None" is printed.
%TRACK_DIFF_COUNT_AND_RATIO_UNPITCHED_LYRIC%
Prints the number of unpitched lyrics (lyrics with no defined pitch, not including pitched lyrics with a freestyle marker), and the percentage of the track difficulty's total note count that represents. If the vocal track is not active, "None" is printed.
%TRACK_DIFF_COUNT_AND_RATIO_PERCUSSION_LYRIC%
Prints the number of percussion lyrics, and the percentage of the track difficulty's total note count that represents. If the vocal track is not active, "None" is printed.
%TRACK_DIFF_COUNT_AND_RATIO_FREESTYLE_LYRIC%
Prints the number of freestyle lyrics (those whose text include a # or ^ freestyle marker), and the percentage of the track difficulty's total note count that represents. If the vocal track is not active, "None" is printed.
%TRACK_DIFF_COUNT_AND_RATIO_PITCH_SHIFT_LYRIC%
Prints the number of pitch shift lyrics (those whose text begins with the + pitch shift marker), and the percentage of the track difficulty's total note count that represents. If the vocal track is not active, "None" is printed.
%COUNT_LYRICS_WITH_PITCH_NUMBER_[PITCH]%
Prints the number of lyrics with the specified pitch. If the vocal track is not active, "None" is printed.
%TRACK_COUNT_HIGHLIGHTED_NOTES%
Prints the number of notes/lyrics in the active track that are dynamically (ie. with "Song>Highlight non grid snapped notes") or statically (ie. with Note>Highlight>On or by various functions) highlighted.
Pro guitar information
%PRO_GUITAR_TRACK_EFFECTIVE_FHP%
Prints the fret hand position in effect at the current seek position. If there is no fret hand position defined at or before the seek position, or if the active track is not a pro guitar track, "None" is printed.
%PRO_GUITAR_TRACK_EFFECTIVE_TONE%
Prints the name of the tone that is in effect at the current seek position of the active track. If there is no tone change at or before the current seek position, but there is a default tone defined, that tone name is printed in parentheses. If there is no tone change defined at/before the current seek position and no default tone defined, or if the active track is not a pro guitar track, "None" is printed.
%FRET_VALUE_SHORTCUTS_SETTING%
Prints a string indicating which strings will be affected by the keyboard functions to set/increment/decrement the fret number or toggle the ghost status of selected pro guitar notes.
Star power path information
%CH_SP_PATH_SCORE%
If a valid star power path is defined, prints the estimated score for the solution in Clone Hero. If no star power path is defined, or the defined path is invalid, "None" is printed.
%CH_SP_PATH_BASE_SCORE%
If a valid star power path is defined, prints the base score (point values of gems and sustains without any bonuses, used to calculate the number of awarded stars) for the solution in Clone Hero. If no star power path is defined, or the defined path is invalid, "None" is printed.
%CH_SP_PATH_AVG_MULTIPLIER%
If a valid star power path is defined, prints the average multiplier (the estimated in-game score (minus solo bonuses) divided by the base score) used to determine the number of awarded stars) for the solution in Clone Hero. If no star power path is defined, or the defined path is invalid, "None" is printed.
%CH_SP_PATH_STARS%
If a valid star power path is defined, prints the number of stars (ie. as "1 star" or "7 stars") estimated for this star power path in Clone Hero. If no star power path is defined, or the defined path is invalid, "None" is printed.
%CH_SP_PATH_DEPLOYMENT_NOTES%
If a valid star power path is defined, prints the estimated maximum number of notes that can be played during the star power deployments, and the percentage of the track difficulty's total note count that represents. If no star power path is defined, or the defined path is invalid, "None" is printed.
%CH_SP_SEEK_SP_PATH_STATUS%
Prints whether or not the seek position is within the estimated scope of any defined star power deployment, and if so, that deployment's start and stop timestamps.
%CH_SP_MAX_DEPLOYMENT_COUNT_AND_RATIO%
Prints the active track difficulty's maximum number of star power deployments and the ratio of deployments to notes, based on the currently defined star power phrases.
%CH_SP_METER_AFTER_LAST_NOTE_HIT%
Prints the star power meter level in effect after hitting the note immediately at/before the seek position.
Various information
%SEEK_POSITION%
Prints the current seek position in minutes:seconds.milliseconds format (or in seconds.milliseconds format if the "Display seek pos. in seconds" preference is enabled).
%SEEK_POSITION_SEC%
Prints the current seek position in seconds.milliseconds format, regardless of the current setting of the "Display seek pos. in seconds" preference.
%SEEK_POSITION_MIN_SEC%
Prints the current seek position in minutes:seconds.milliseconds format, regardless of the current setting of the "Display seek pos. in seconds" preference.
%SEEK_POSITION_PERCENT%
Prints the current seek position as a percentage of the chart's total length.
%START_POINT%
Prints the position of the start point (see Edit>Set start point). If no start point has been defined, "None" is printed.
%END_POINT%
Prints the position of the end point (see Edit>Set start point). If no end point has been defined, "None" is printed.
%INPUT_MODE_NAME%
Prints the name of the input mode currently in use (Defined in File>Preferences>Preferences), the default setting of which is "Piano Roll".
%PLAYBACK_SPEED%
Prints the playback speed in percent (the percent sign is not printed).
%GRID_SNAP_SETTING%
Prints the current grid snap setting. If a custom grid snap setting is in use, the number of intervals per-beat or per-measure is displayed as appropriate.
%NOTE_GAP%
Prints the current "Min. note length" preference.
%SELECTED_CATALOG_ENTRY%
Prints the currently selected fret catalog entry number out of the total catalog entry count. If there are no catalog entries, "0 of 0" is printed.
%SELECTED_CATALOG_ENTRY_NAME%
Prints the name of the currently selected fret catalog entry. If there are no catalog entries, or the active entry does not have a defined name, "None" is printed.
%LOADED_OGG_NAME%
Prints the relative file name (excludes the folder path) of the currently loaded OGG file. If no audio is loaded, "None" is printed.
%TEXT_FILE%
Prints relative path (not including the folder path) of the text file loaded for display in the Notes panel.
%KEY_INPUT_STATUS%
Prints the key status of CTRL, ALT and SHIFT (displays an asterisk * if the key is detected as being held), as well as the scan code and ASCII code of the last pressed key.
%WINDOW_HEIGHT%
Prints EOF's current program window height (set in File>Display>Display).
%WINDOW_WIDTH%
Prints EOF's current program window width (a default width set in File>Display>Display or a custom width set in File>Display>Set display width).
%ACTIVE_DIFFICULTY_NUMBER%
Prints the number of the active difficulty, where 0 is the lowest (ie. Easy in Rock Band) and 255 is the highest (ie. in Rocksmith).
%ACTIVE_DIFFICULTY_NAME%
Prints the name of the active difficulty, taking the "Use FoF difficulty naming" preference into account.
%3D_MAX_DEPTH%
Prints the current maximum depth of the 3D preview's camera (ie. how far back the displayed track goes), as controlled by ALT+numpad minus, ALT+numpad plus.
%MOUSE_X%
Prints the mouse X coordinate, as well as the relative X coordinate and name of whichever sub-window the mouse is in.
%MOUSE_Y%
Prints the mouse Y coordinate, as well as the relative Y coordinate and name of whichever sub-window the mouse is in.
%EOF_HOVER_PIECE%
Prints the lane number the mouse is currently hovered over, or -1 if the mouse isn't hovered directly over any lane.
%EOF_FPS%
Prints the number of frames per second rendered in the main loop of EOF (ie. doesn't count benchmarking, while dialogs are open, etc).
%GRID_SNAP_SEEK_POS_LENGTH_NPS%
Prints the length and effective note per second rate of the current grid snap length at the current seek position. If no grid snap is enabled, "None" is printed.
%PHASE_CANCELLATION%
Prints the "on" or "off" status of the phase cancellation audio feature.
%CENTER_ISOLATION%
Prints the "on" or "off" status of the center isolation audio feature.
%SEEK_SP_STATUS%
Prints whether or not the seek position is within a defined star power phrase, and if so, that phrase's start and stop timestamps. If not, "Seek pos is not within an SP phrase" is printed.
%SEEK_SP_STATUS_CONDITIONAL%
Similar to %SEEK_SP_STATUS% but prints nothing if the seek position is not within a star power phrase.
%SEEK_LYRIC_LINE_STATUS%
Prints whether or not the seek position is within a defined lyric line, and if so, that line's start and stop timestamps. If not, "Seek pos is not within a lyric line" is printed.
%SEEK_LYRIC_LINE_STATUS_CONDITIONAL%
Similar to %SEEK_LYRIC_LINE_STATUS% but prints nothing if the seek position is not within a lyric line.
%SEEK_SLIDER_STATUS%
Prints whether or not the seek position is within a defined slider phrase, and if so, that phrase's start and stop timestamps. If not, "Seek pos is not within a slider phrase" is printed.
%SEEK_SLIDER_STATUS_CONDITIONAL%
Similar to %SEEK_SLIDER_STATUS% but prints nothing if the seek position is not within a slider phrase.
%SEEK_SOLO_STATUS%
Prints whether or not the seek position is within a defined solo phrase, and if so, that phrase's start and stop timestamps. If not, "Seek pos is not within a solo phrase" is printed.
%SEEK_SOLO_STATUS_CONDITIONAL%
Similar to %SEEK_SOLO_STATUS% but prints nothing if the seek position is not within a solo phrase.
%SEEK_TRILL_STATUS%
Prints whether or not the seek position is within a defined trill phrase, and if so, that phrase's start and stop timestamps. If not, "Seek pos is not within a trill phrase" is printed. In the case of drum tracks, trill phrases are referred to as "special drum rolls".
%SEEK_TRILL_STATUS_CONDITIONAL%
Similar to %SEEK_TRILL_STATUS% but prints nothing if the seek position is not within a trill or special drum roll phrase.
%SEEK_TREMOLO_STATUS%
Prints whether or not the seek position is within a defined tremolo phrase, and if so, that phrase's start and stop timestamps. If not, "Seek pos is not within a tremolo phrase" is printed. In the case of drum tracks, tremolo phrases are referred to as "drum rolls".
%SEEK_TREMOLO_STATUS_CONDITIONAL%
Similar to %SEEK_TREMOLO_STATUS% but prints nothing if the seek position is not within a tremolo or drum roll phrase.
%SEEK_SLIDER_STATUS%
Prints whether or not the seek position is within a defined slider phrase, and if so, that phrase's start and stop timestamps. If not, "Seek pos is not within a slider phrase" is printed.
%SEEK_SLIDER_STATUS_CONDITIONAL%
Similar to %SEEK_SLIDER_STATUS% but prints nothing if the seek position is not within a slider phrase.
%SEEK_ARPEGGIO_STATUS%
Prints whether or not the seek position is within a defined arpeggio phrase, and if so, that phrase's start and stop timestamps. If not, "Seek pos is not within an arpeggio" is printed.
%SEEK_ARPEGGIO_STATUS_CONDITIONAL%
Similar to %SEEK_ARPEGGIO_STATUS% but prints nothing if the seek position is not within an arpeggio phrase.
%SEEK_HANDSHAPE_STATUS%
Prints whether or not the seek position is within a defined handshape phrase, and if so, that phrase's start and stop timestamps. If not, "Seek pos is not within a handshape" is printed.
%SEEK_HANDSHAPE_STATUS_CONDITIONAL%
Similar to %SEEK_HANDSHAPE_STATUS% but prints nothing if the seek position is not within a handshape phrase.
Menu Functions
Article Content
64 sections Section of 64
EOF Manual - Menu Functions p {text-indent: 1cm}
![]()
A song editor for "Frets On Fire"
Menu Functions
EOF contains many useful functions which can be accessed through various menus. Many functions also have a keyboard shortcut to expedite the song editing process. Let's get to it.
[ File ] [ Edit ] [ Song ] [ Track ] [ Note ] [ Beat ] [ Help ]
File
[ New ] [ Load ] [ Save ] [ Save As ] [ Quick save ] [ Load OGG ] [ Import ] [ Export chart range ] [ Export audio range ] [ Export Guitar Pro ] [ Export image sequence ]
[ Settings ] [ Preferences ] [ Display ] [ Controllers ] [ Song Folder ] [ Link To FOF ] [ Link To Phase Shift ] [ Link to RocksmithToTab ] [ Exit ]
New
Create a new EOF project. You will select an audio file (in OGG, WAV or MP3 format), choose a destination for the new project, and enter some information about the song. If the selected audio file contains tag information, the song artist, title and year will be automatically entered into the song's properties from the audio file's ID3v1/ID3v2 tag or OGG Vorbis tag comments if available. The album information will be similarly read into an INI setting if it is available. When choosing a destination for your project you have three options. "Use Existing Folder" requires you to point to an existing folder where EOF will create your project files. "Use OGG Folder" will place the project files in the folder with the audio file you selected. "Create New Folder" will create the folder you specify in EOF's own song folder (see File>Song Folder).
Wherever you choose to store the project, the OGG file you chose will be copied to "guitar.ogg" (required by "Frets On Fire"). If you choose an MP3 file, and you have LAME and Vorbis Tools installed (included in Windows version of EOF), EOF will convert it to "guitar.ogg" using the average bitrate you specify in the "OGG Settings" dialog, automatically re-sampling the audio to 44khz if necessary. A copy of the MP3 file will also be saved as "original.mp3" in the project folder, for use with the Leading Silence feature. If you do not have LAME and Vorbis Tools installed, you will not be able to use the built-in MP3 conversion.
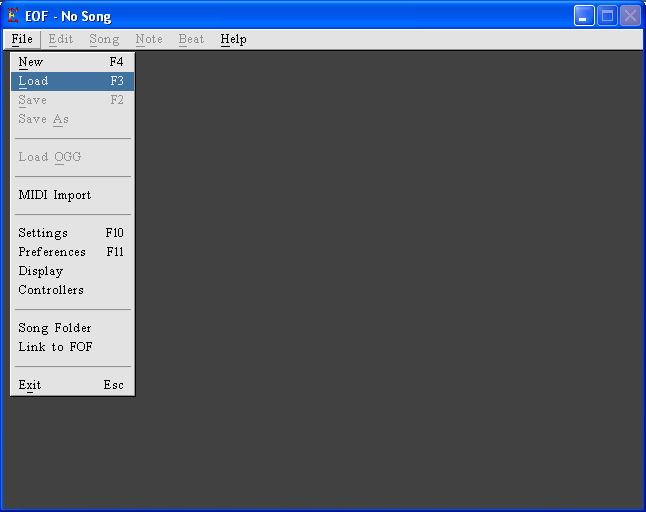
Load
Load an existing EOF project. EOF will look for a "guitar.ogg" file in the same folder as the EOF project file you loaded. If it cannot find one you will be asked to locate an OGG (or MP3, which will be converted to OGG format) file for EOF to load. If you cancel the prompt to browse for chart audio, EOF will open the project without any audio and playback controls will be disabled, and audio will not be saved with the other chart files during Save/Save As. If no audio is loaded, File>Load Ogg can be used to allow playback and the saving of the loaded audio during save operations.
Save
Save the current EOF project. When saving a project EOF automatically generates all the files needed for the song to work in "Frets On Fire."
Save As
Save the current EOF project to a new location. Subsequent "Save" requests will write the song files to the new location. If no "guitar.ogg" exists in the destination folder, EOF will create one using the currently loaded OGG file.
Quick save
Save the current EOF project and creates any additional files enabled in File>Preferences, but without all of the prompts and warnings that the Save and Save as functions present. Error messages are still displayed if problems are encountered during quick save.
Load OGG
Load a new OGG file into the current project. At this time, EOF will only allow you to load OGG files that are in the same chart as the folder. This is for privacy reasons, so if somebody shares an EOF project file, it won't expose the person's folder names on the author's computer. If your song has separate audio for the guitar or other instrument you are fretting you can use this function to switch out the audio.
EOF keeps separate "Delay" settings for each differently named OGG file you load. This allows you to use tracks of differing length without having to adjust the delay and notes each time you swap OGG files. This is useful if you have two different versions of the same song, perhaps a karaoke version without vocals and a normal version. Setting up the "Delay" for each file will automatically move the beats and notes to the correct place each time you use "Load OGG" to swap them out.
Import
[ Sonic Visualiser ] [ MIDI ] [ Feedback ] [ Guitar Hero ] [ Lyric ] [ Guitar Pro ] [ Rocksmith ] [ Bandfuse ]
Sonic Visualiser
Sonic Visualiser is an audio analysis program that supports a large selection of plugins to process sound and while the beat estimation generally isn't as accurate as painstakingly syncing beats manually, the results are very impressive for an automated process. This feature would probably work best when you are first creating a chart instead of after you have authored your notes, but it's up to you if you want to use it after. To use this feature, download Sonic Visualiser (http://www.sonicvisualiser.org/download.html) and the Queen Mary plugin set (http://www.vamp-plugins.org/download.html) and install both of them. The simplest way to install the Queen Mary plugin set in Windows involves extracting qm-vamp-plugins.dll, qm-vamp-plugins.cat and qm-vamp-plugins.n3 and placing them at "C:\Program Files\Vamp Plugins\" (or at "C:\Program Files (x86)\Vamp Plugins\" instead if you're using a 64 bit version of Windows).
Once installed, open Sonic Visualiser and have it open your chart audio (ie. guitar.ogg) and you should see it begin to draw a waveform graph of the audio. Once it finishes, open the Transform menu, select "Analysis by category>Time>Tempo>Tempo and beat tracker: Beats". You can adjust the plugin parameters in the window that pops up if you want to experiment, otherwise just click OK and wait a minute. You should see lines plotted over the waveform that represent each beat of the song and a new layer tab will open on the side where you can change the line color. You can even change the plot type to segmentation to get a better view of the detected beat positions. If you are satisfied with the results, you can export the beat positions to a file that EOF can import. To do so, make sure that layer is still in the foreground (it is the selected layer tab on the side of the program) and use "File>Export annotation layer" and choose a place to save the file (your project folder would be a good place). Then in EOF, while your project is open, use "File>Sonic Visualiser Import" and select the file you just exported from that program. The project's tempo map will be updated to reflect the information in the file, but if the results aren't to your liking, you can undo the changes and trying other settings in Sonic Visualiser's beat estimation. Sonic Visualiser's "Tempo and beat tracker" plugin also has a "Tempo" estimation function, but in my brief testing, its results were not anywhere near as good as the "Beats" estimation, but you can certainly have the plugin run both estimations separately and just export whichever one you think is more correct, just make sure the tab for the one you want to export is active before you go to export the annotation layer.
MIDI
Create a new EOF project from an existing MIDI file. This function is useful if you want to edit a song which was not created in EOF or if you want to alter a chart where the EOF file is not available. Tracks are imported from the MIDI file and song properties are loaded from "song.ini" if it exists. A Rock Band Audition (RBA) file contains a chart that was authored for Rock Band Network (RBN). EOF provides the ability to open the MIDI data from this type of file the same way as a normal Rock Band MIDI. EOF will look for a "guitar.ogg" file in the same folder as the MIDI file you loaded. If it cannot find one you will be asked to locate an OGG (or MP3, which will be converted to OGG format) file for EOF to load. If you cancel the prompt to browse for chart audio, EOF will open the project without any audio and playback controls will be disabled, and audio will not be saved with the other chart files during Save/Save As. If no audio is loaded, File>Load Ogg can be used to allow playback and the saving of the loaded audio during save operations.
If bass notes in lane 1 are found to have forced HOPO on phrases, EOF will prompt about whether to import these as open strum bass notes (see Enable open strum). If the "sysex_open_bass = True" tag is found in the imported MIDI's song.ini file, such notes will be imported as open strum bass notes automatically without prompting.
If an imported MIDI has yellow, blue or purple drum notes and no tom phrases, EOF will import them as cymbals instead of toms if the "pro_drums = True" tag is found in the imported MIDI's song.ini file. This tag allows a chart with all cymbals to be correctly identified and differentiated from a chart with all tom drums. This serves as a workaround to Harmonix's goof that in pro drums, all yellow, blue and green drums are treated as cymbals by default, which introduced a significant amount of Rock Band Network charts that do not play correctly in regards to pro drums.
If any unsupported (yet recognizable as Rock Band related) MIDI tracks are encountered (pro keys, harmony vocal tracks), EOF will offer to store them into the project instead of just ignore them. Each event in the stored MIDI tracks is stored in high precision millisecond timing, and is saved to the output MIDI during project save conforming to the chart's tempo map. This functionality should be useful for importing a MIDI that uses unusual tempo mapping (like ones with mid-beat tempo/TS changes) for the purposes of adding a pro guitar upgrade, adding new instrument/harmony tracks to a chart or simply synchronizing a chart with audio. The stored MIDI tracks can be listed/deleted via the Songs>"Manage raw MIDI tracks" menu function.
If the imported MIDI file has any tempo or time signature changes that occur BETWEEN beat markers, EOF will alert you of this and offer to store the tempo and beat tracks into the project. If you intend to modify an existing chart for use in Rock Band, such as creating an upgrade containing pro guitar, the upgrade automatically uses the original chart's tempo map when played in-game. Originally this was problematic because by design, EOF would insert extra beats when mid beat tempo or time signature changes were found, so that each change could occur on a beat marker. These extra beats would cause the upgrade file's timing to be different enough from the original imported chart to cause synchronization discrepancies. However by allowing the original tempo map to be stored into the project, during MIDI export, all events are written with the stored tempo map's timing, eliminating this problem.
If the MIDI being imported is in the format of the rhythm game "Power Gig", the five difficulties for each the guitar and drum tracks and the vocal track are imported. The fifth difficulty of these instrument tracks is stored in the BRE difficulty. Most rhythm games only support four difficulties though, so to remove the difficulty you don't want, make that difficulty active and use the Track>Delete active difficulty function. This will remove the active track and move all the higher difficulties' notes down one difficulty to result in four populated difficulties.
If Guitar Hero 1 or 2 style drum animations are encountered, they are imported as drum notes where applicable. These drum animations weren't authored as accurately as actual drum charts from later Guitar Hero and Rock Band games, but they are a good starting point.
Feedback
Create a new EOF project from an existing Feedback chart file. This type of file (typically has a ".chart" file extension) is a chart format generally created using the Feedback chart editor and was originally intended for creating custom charts for Guitar Hero. Various conversion utilities have been created previously allowing people to convert these charts into a MIDI file usable in Frets on Fire. This function allows Feedback charts to be imported. It will look in the chart's folder to try to load whichever audio file is specified by the chart (MP3, WAV and OGG are supported). If that file is not present, it will try to open guitar.ogg. If that file is not present, if the chart's folder only has one OGG file in it, it will try to open that file. If there is no OGG file in the folder, or if there are multiple OGG files to choose from, EOF will have you browse for the audio file to use. If you cancel the prompt to browse for chart audio, EOF will open the project without any audio and playback controls will be disabled, and audio will not be saved with the other chart files during Save/Save As. If no audio is loaded, File>Load Ogg can be used to allow playback and the saving of the loaded audio during save operations. Feedback charts containing non-standard 5 lane drums are supported. Section markers that are imported will be altered as necessary to make them comply with the "[section SECTION_NAME]" naming convention. Any [solo_on] and [solo_off] events that are imported are converted into solo sections for guitar (PART GUITAR) and lead guitar (PART GUITAR COOP). A note that starts less than 11/128 measures from the beginning of the previous note will be treated as a forced HOPO note. Notes that aren't forced HOPOs are imported as forced strums. If either the "N 5 #" or "E *" unofficial toggle HOPO notations are encountered during import, these will change non-HOPO notes into HOPO notes and vice-versa. If the "N 6 #" unofficial tapping notation is encountered, slider phrases are created to define these notes. If the "N 7 #" or "E O" unofficial open note notations are encountered, affected notes are imported as open notes.
5 lane chords in guitar/bass tracks are converted to open strum notes, but this behavior can be prevented by enabling the "Don't auto-name double stops" import/export preference.
Guitar Hero
Create a new EOF project from an existing Guitar Hero note file (generally GH World Tour or newer), which are generally one of two formats depending on the source game (ie. NOTE format from GH5, Band Hero and GH: Warriors of Rock and QB format from GH World Tour, GH Metallica, GH Smash Hits, GH Van Halen). Older formats may require using a utility like GHTCP to export it to db chart (dbc) format. These types of file (often with an extension such as .pak.ngc) are common when working with custom charts for Guitar Hero and usually contains guitar, bass and star power phrases. It can also contain slider guitar sections, drum notes, drum rolls/swells and pitched lyrics. Some songs contain an additional "aux" instrument section that will be imported into the keys track. The aim for this import function is to get a true one to one conversion, and forced HOPO notes are optionally imported as such. In Guitar Hero, all notes that are not explicitly HOPO on must be strummed, but EOF will prompt about whether or not such notes will be imported with HOPO off notation. Drum rolls/swells are conceptually similar to drum rolls and special drum rolls in Rock Band standards, but in Guitar Hero, these phrases are marked as long drum notes instead of phrases containing drum gems. Lyric phrases will also be trimmed to fit the lyrics they contain, and empty phrases will be removed. When EOF finds practice sections in a Guitar Hero file, it will display the sections of each included language one language at a time and allow the desired language to be selected. EOF will look for a "guitar.ogg" file in the same folder as the MIDI file you loaded. If it cannot find one you will be asked to locate an OGG (or MP3, which will be converted to OGG format) file for EOF to load. If you cancel the prompt to browse for chart audio, EOF will open the project without any audio and playback controls will be disabled, and audio will not be saved with the other chart files during Save/Save As. If no audio is loaded, File>Load Ogg can be used to allow playback and the saving of the loaded audio during save operations. If the imported Guitar Hero file is in QB format (ie. pre GH5), EOF will add a "drum_fallback_blue = True" INI entry if any drum gems are imported. This tag will be used in future versions of Phase Shift to decide how to down-chart a 5 lane drum chart to play on a 4 lane drum kit (ie. to mimic how Guitar Hero would handle it).
Lyric
Imports lyrics from an existing file into the current EOF project (this menu function is grayed out if no project is loaded). Beats are appended to the chart if it is not long enough to contain all imported lyrics. See the Lyric import section of the vocal tutorial for details.
Guitar Pro
Import a drum track or replace the active pro guitar track or track difficulty in the current EOF project with one from a specified Guitar Pro file, with as much notation kept as possible (the number and tuning of guitar strings, vibrato, harmonics, tremolo picking, tapping, up/down strumming/picking, hammer ons, pull offs, bends, slides, palm mutes and trills). Guitar Pro is a music transcription program, and its file format is arguably the most popular electronic format for guitar tablature. Some third party programs (most notably the free program "TuxGuitar") also allow you to view and author files in this format.
To import a Guitar Pro drum track into your project, import the file and select the appropriate percussion track from the list. You will be asked whether to import that track to the normal drum track, the Phase Shift drum track or both.
To import a Guitar Pro guitar/bass track into your project, change the active track to any of the five pro guitar or pro bass tracks (this menu function is grayed out if a pro guitar/bass track is not active), invoke this function from the File menu, select a Guitar Pro file (format 5.x or older), select one of the listed instrument tracks and click the import button. By default, if the EOF project's active pro guitar track had any contents, they are discarded and replaced with the imported track. If the "GP import replaces active track" import/export preference is not enabled, the imported GP track will instead only replace the active track difficulty and leave the other difficulties in the active track as-is. If a pro guitar/bass track's difficulty limit has been removed (see Track>Rocksmith>Remove difficulty limit), or if the user preference is not configured to replace the active track (instead replacing only the active difficulty), tremolo picking notation imported from the GP file will be made track-specific and will only appear while the track's difficulty limit remains removed (while the difficulties are numbered instead of named). This is because in Rocksmith, tremolo notation is defined on a per-difficulty basis, and in Rock Band 3, it equally applies to all difficulties in a track. The best way to determine which track to import is to open the Guitar Pro file in a program that supports the format (Guitar Pro or TuxGuitar are likely the two best options) and compare the contents of the tracks to determine which one you're interested in. Or you can simply undo the import if it doesn't turn out to be the track you wanted. To import different Guitar Pro tracks to different tracks in the EOF project, finish importing one Guitar Pro track, change the active track in EOF to one of the other pro guitar/bass tracks, and perform Guitar Pro import again (importing from the same Guitar Pro file, or a different one if desired).
When the Guitar Pro file is processed, you are given the option to import the time signature changes from the Guitar Pro file, overriding any that exist in the EOF project. This is only important if you want the imported notes to appear verbatim, measure by measure, to the original transcription in the Guitar Pro file. If the Guitar Pro file has multiple voices authored for a track (a feature in the Guitar Pro 5 format), only the default voice (lead) is imported. If the Guitar Pro file uses any 7 string tracks, EOF will prompt whether to drop either the highest or lowest string, since only 6 strings can be imported. If the GP file contains tie notes that overlap each other, these notes are truncated during import because Rock Band doesn't support this and Rocksmith likely doesn't either. If the imported track uses a capo, the capo position is imported and the fret values of the imported notes will remain the same as they are defined in the GP file. If the Guitar Pro file has bends notated, the bend definition is imported as tech notes (see Track>Rocksmith>Enable tech view), to accurately recreate the bend for use in Rocksmith 2014.
Even though EOF can't import a GPX (Guitar Pro 6 format) file, there are websites (such as http://www.webtabplayer.com/TabConverter) that can convert these tabs to a supported format (like GP5) for free.
This function can also import an exported Go PlayAlong XML file, which combines Guitar Pro files with synchronization information. To do so, select an appropriate XML file, which needs to be in the same directory as the related GP file. Importing a Go PlayAlong file will force the time signatures to import, since GPA sync points reference measure numbers. EOF has logic to try to handle various different ways the Go PlayAlong project is synchronized, but for best results, make sure to sync the first measure of the tablature. If the tablature is synchronized in a way where one or more beats are positioned with a negative timestamp (are before the start of the audio), those beats are omitted from import. This cannot be avoided if you synchronized the file this way, but the worst side effect would be that the imported notes won't begin at the same measure as notated in the original Guitar Pro file.
Rocksmith
Replace the active pro guitar track in the current EOF project with the contents of a specified Rocksmith XML file. To import a Rocksmith arrangement into your project, change the active track to any of the five pro guitar or pro bass tracks (this menu function is grayed out if a pro guitar/bass track is not active), invoke this function from the File menu and select a Rocksmith XML file. The active project's beat markers are synced to the information in the XML file. In addition, song properties (ie. song title), arrangement name/type, phrases, popup messages, sections, events, difficulty levels (including notes, chords and fret hand positions) and the tuning are imported.
Bandfuse
Create a new EOF project from an existing Bandfuse chart file. This type of file (often with an extension such as .rif) is a binary chart format used by Bandfuse. Like Rocksmith, this game offers gameplay with real guitars and like Rock Band it supports a microphone for pitched vocal scoring. The difficulty system is different than both of those games though. It uses static (doesn't change dynamically based on the user's performance) difficulties, but the number of difficulties per instrument varies. The rhythm guitar and bass guitar arrangements can each have up to 5 difficulties, but for simpler songs some difficulty levels are omitted. The lead guitar arrangement is authored as difficulty level 6 of the guitar track.
Export chart range
Saves a user-defined portion of the active project as a new project file, with the corresponding portion of the chart audio being exported as a new OGG file. For best results, use the Set start point and Set end point functions to mark the part of the project you want to export.
Export audio range
Similar to "Export chart range", but just exports an OGG file to the specified name and location. For best results, use the Set start point and Set end point functions to mark the part of the project you want to export.
Export Guitar Pro
Uses the command line RocksmithToTab utility (available at http://www.rocksmithtotab.de/) to be used to create a GP5 file of the active project in the project's folder. This function requires you to have installed the utility and linked EOF to it (see File>Link to RocksmithToTab).
Export image sequence
If you wanted to create a video of your chart, you may be worried about lag when using screen recording software. EOF has a solution to that problem by allowing you to create an image sequence (one PCX format image file for each frame of the chart, at a rate of 30 FPS). The PCX files are created with incrementing file names in a "sequence" sub folder of your chart's project folder. You can use the free VirtualDubMod (http://virtualdubmod.sourceforge.net/) application to create a video out of this sequence:
1. Open the image sequence (in VirtualDubMod, open File>Open video file and select the lowest number PCX file in the sequence. It will automatically load the other PCX files (as long as you don't disable the "Automatically load linked segments" option) as raw video frames.
2. Open Video>Frame Rate and change the source rate to 30 to match the 30FPS that EOF exported with.
3. Select your desired compression/filter/etc. settings in the Video menu. I usually go with the Xvid codec and perform two passes. For the first pass, select "Twopass - 1st pass" in the Xvid configuration options and then select "Save as" from the file menu. Then for the second pass, without changing any other settings, go back to Xvid configuration options and select "Twopass - 2nd pass". This time, you have to specify a target bitrate. Sometimes if I feel too lazy to pick a bitrate, I use the average bitrate given by the Xvid status window from the first pass, but you can pick any valid bitrate you want and then use File>Save as to overwrite the file created in the first pass of the compression. When it completes, you will have a video file without audio.
4. Use your favorite video editing application to "mux" in the audio for your chart. I usually go with one of the other VirtualDub releases (http://virtualdub.sourceforge.net/) or (http://home.comcast.net/~fcchandler/stable/) for this because handling audio streams in VirtualDubMod just seems more complicated to me. You may need to convert your chart's audio to regular WAV format for this step, depending on the tool you are using. In VirtualDub, you would open the Audio menu, select "WAV Audio" and select your chart audio file. If you do provide the audio as a WAV file, make sure to enable the audio to be compressed again by selecting Audio>Full Processing Mode, then Audio>Compression and select your desired codec and settings. I usually use LAME MP3 and a constant (CBR) bitrate setting, constant bitrate is more reliable for audio/video synchronization in general.
5. You can show the finished video to your friends, upload it someplace like Youtube or whatever you want.
Settings
Change the program settings. See Configuring EOF for details
Preferences
Change the user preferences. See Configuring EOF for details
Display
Changes display options. If a pro guitar/bass track's difficulty limit has been removed (see Track>Rocksmith>Remove difficulty limit), more than 5 difficulty tabs will be allowed to display, depending on the program window's width.
Display: Changes the size of the EOF window to one of the pre-set sizes. Also provides an option to use a software based cursor instead of the normal cursor in your Operating System, in case it's not working properly. Also provides an option to run in 8 bit color mode, in case there's a reason you need to do so, but this will lower performance unless your computer is running in 8 bit color mode to match.
Set display width: Allows you to increase the program window's width to a value above the default width for the active pre-set window size. If the specified width cannot be set (such as if it's wider than your computer's current display resolution), EOF will revert to the default width for the active pre-set window size.
x2 zoom: Doubles the size of everything displayed in EOF except for the menus and dialog functions.
Redraw: Rebuilds the EOF window in unusual cases where it stops updating, such as if you leave it running after a Remote Desktop session.
Benchmark image sequence: Tests and reports the render speed of EOF for the current project and display settings, allowing the user to easily check the effectiveness of different customizations or build options.
Set 3D HOPO image scale size: Specifies the size to render HOPO gems in non GHL mode tracks in the the 3D preview. By default, such HOPO notes will display 75% the size of normal notes.
Enable Notes panel: Hides or shows an additional panel of text below the piano roll, resizing EOF's program window width if necessary for the panel to be displayed (the resize is skipped if either the Into panel or 3D preview are disabled in File>Preferences>Preferences). The contents of the Notes panel is defined in notes.txt file in EOF's program directory, which can be edited to display things like your favorite keyboard shortcuts, to-do items, etc. Disable and re-enable the notes panel to reload any changes you have made to the file while EOF is already displaying the notes panel. The notes panel will be allowed to take up all space on the bottom half of the EOF window that isn't in use by the Info panel or 3D preview. Please see the Notes panel documentation for more information on customizing the Notes panel.
Controllers
Configure guitar and drum controllers. These can be used in tandem with the "Guitar Tap" and "Guitar Strum" edit modes.
Song Folder
Tell EOF the base folder where to save new projects. New projects created with the "Create New Folder" option will be created in a folder inside of the base folder. For example, if you select "C:\games\fof\wipsongs" for the base folder and create a new project with "Create New Folder" and "my new song" as the new folder name, the project will be stored in "c:\games\fof\wipsongs\my new song\"
Link to FOF
Allows you to link EOF to "Frets On Fire" if you are using a mod which allows starting a song from the command line (RF or FoFiX for example). You will first locate "FretsOnFire.exe" and then select the location of the song library (the base song folder). If done correctly, you will be able to launch FOF with the currently open song for testing (see Song>Test In FOF).
Link to Phase Shift
Allows you to link EOF to Phase Shift, which will start a song from the command line. You will first locate "Phase Shift.exe" and then select the location of the song library. If done correctly, you will be able to launch Phase Shift with the currently open song for testing (see Song>Test in Phase Shift).
Link to RocksmithToTab
Allows you to link EOF to RocksmithToTab (available at http://www.rocksmithtotab.de/), allowing the project's pro guitar and bass tracks to be manually exported to Guitar Pro 5 (gp5) format (see File>Export Guitar Pro). Make sure to link to the command line program (RocksmithToTab.exe) for this feature to work as expected.
Exit
Close EOF. If you have unsaved changes you will be prompted to quick save the project.
Edit
[ Undo ] [ Redo ] [ Copy ] [ Paste ] [ Old Paste ] [ Paste From ] [ Grid Snap ] [ Zoom ] [ Preview Speed ] [ Playback Rate ] [ Preview HOPO ] [ Metronome ] [ Claps ] [ Clap Notes ] [ Vocal Tones ] [ MIDI Tones ]
[ Bookmark ] [ Selection ] [ Set start point ] [ Set end point ]
Undo
Undo the previous operation. You can undo up to 100 operations.
Redo
Redo the previously undone operation.
Copy
Copy the currently selected notes to the clipboard (see Editing Songs). The clipboard is shared between all instances of EOF. If you copy notes in one instance, you can paste them into another instance. If you copy notes in both instances, only the most recently copied notes will be in the clipboard. Copied notes' statuses are kept on the clipboard and are applied to the pasted notes accordingly. If the first note that is selected is between 1 and 10 milliseconds before a beat marker, EOF will note that it appears to be off and offers to adjust the note's position so that it lines up with the beat marker.
Paste
Paste notes from the clipboard. Note positions and lengths are pasted relative to the beat markers meaning pasted notes will stretch and shrink depending on the BPM of the beats being pasted into. Pasted notes will begin at the current seek position and continue on through subsequent beats. You can use the Song>Seek menu's functions to seek by beat and grid snap to effectively control where the notes are pasted. This allows pasted notes to retain their original grid snap positions even when you are pasting into beats that have different tempos than the copied notes. By default, pasted notes merge with any notes that already exist, with the pasted notes winning any contention for statuses (ie. if a normal yellow gem is pasted onto a yellow cymbal, the result is a normal yellow gem). Alternatively, if the "Paste erases overlap" preference is enabled, any note that is within the range of the chart that would be altered by a paste operation are deleted. If any notes being pasted use a lane higher than the active track supports (ie. pasting 5 lane bass notes into 4 lane pro bass), the gems on the exceedingly-high lanes are dropped, unless this causes the note to have no gems, in which case the note is converted to a chord using all lanes. This helps identify places where pasted notes would need particular attention for note consistency, etc. If the copied notes have arpeggio or handshape phrases when paste is performed, those phrass are created to encompass the pasted notes.
Old Paste
The same as "Paste" except the note positions and lengths are not scaled to fit into the beats. The notes will remain exactly as they were copied and the first note will be pasted exactly on the position line.
Paste From
Paste notes from another difficulty in the active track. "Paste From>Supaeasy/Easy/Medium/Amazing/Difficulty" copies all notes from the specified difficulty to the currently selected difficulty (useful for downgrading songs to lower difficulties). "Paste From>Catalog" pastes notes and their statuses from the currently selected catalog entry. If the "Paste erases overlap" preference is not enabled, paste from catalog will stop pasting notes early if it reaches a beat that has notes in it, to prevent notes from being overlapped. If Paste From is used on a pro guitar/bass track, EOF will offer to also copy the arpeggio sections, fret hand positions (both of which are defined on a per-track-difficulty basis) and difficulty-specific tremolo phrases if there are any in the specified difficulty.
Grid Snap
Change the current grid snap setting. Grid snap forces note placement to the specified setting. If you have created a tempo map for your song, turning grid snap to an appropriate setting will save you lots of time when placing notes.
The built-in grid snap settings assume 4/# (4 beats per measure) time signature, so a grid snap setting of 1/4 means that each grid snap position occurs at 1/4 of a measure intervals. With this setting you can fit up to four separate notes into one measure. A grid snap setting of 1/8 means that each grid snap position occurs at 1/8 of a measure intervals and so on and so forth. Using a custom grid snap level, you can define the number of intervals per beat or per measure. Keep in mind that if you supply a custom "per measure" grid snap, you must also place time signatures where appropriate, in order to define the number of beats per measure. Otherwise, one beat per measure will be assumed. Currently, a limit of 96 intervals is in place, because using higher values will rarely be practical.
The "Display grid lines" function toggles the display of each grid snap position based on the current grid snap setting. When grid lines are being displayed, any note that isn't at a grid snap position will have its vertical line rendered in red instead of gray, making it obvious that it doesn't line up with a grid line.
Zoom
Change the zoom level of the fretboard editing area. For faster songs, zooming in can help with note placement. Zooming out can allow you to see more of the song at once, such as when comparing repeating parts of a song. The custom zoom option allows you to indicate how many milliseconds each pixel of the editor window represents. You can use the zoom in/out shortcuts (+ and - on the numberpad) to zoom in and out of a custom zoom level. If a custom zoom is in effect when EOF closes, it is restored when re-opening EOF.
Preview Speed
Change the speed of the fretboard in the 3D Preview.
Playback Rate
Change the speed of the audio playback. For fast solo sections it can be useful to play the song back at a slower speed to make it easier to hear the notes in the song. You can play the song back at 50% speed without changing the setting by holding the Ctrl key while beginning playback. You can play the song back at 100% speed without changing the setting by holding the D key while beginning playback. You can play the song back at 25% speed without changing the setting by holding both the Ctrl and Shift keys while beginning playback. You can also specify a custom playback by specifying the percentage of full speed it should play back, such as 30 or 200. By default, any time a playback speed other than 100% is initiated, EOF uses the time stretch feature. This feature leverages the rubberband library to use phase vocoding techniques to allow chart audio to be played back slower than full speed without changing the pitch. This is more processor intensive so you may need to increase your audio buffer (and AV delay) to compensate, but you can disable this feature by unchecking the "Edit>Playback rate>Time stretch" option.
Preview HOPO
Select the algorithm used to determine which notes display as HO/PO notes in EOF's 3D preview panel. RF is equivalent to "Guitar Hero 2." If you are using RF-Mod or FoFiX you should use this setting. FOF is for standard "Frets On Fire." Manual will only show notes within forced HO/PO On phrases as HO/PO notes, making it more useful for authoring in Rock Band or other rhythm games that may support this notation, as well as to future-proof your chart should FoFiX eventually support forced HO/PO On/Off phrases. An important note: HO/PO notes are determined by an algorithm in all current versions of FOF, FoFiX and all current mods, so what EOF shows is not necessarily what the user will see in-game in regard to HO/PO notes. What the players receive for HO/PO notes depends on their settings and what version of the game they are using. In order for a note to be a HO/PO note in FoF, it normally has to be within 1/12th measure or less of the previous note. Turning on the "Eighth Note HO/PO" setting in "Song Properties" will change the HO/PO note threshold to 1/8th instead, for mods that support the "Eighth Note HO/PO" song.ini file setting.
Metronome
Toggle the metronome. When the metronome is on, a tick will sound at every beat marker during audio playback. This feature is useful when you are creating a tempo map for your song. See Creating a Tempo Map for a demonstration of how to use this feature.
Claps
Toggle note claps. When note claps are on, a clap will sound at every note during audio playback. This feature is useful to ensure your notes are synchronized with the audio in the song. If your notes are placed correctly, the clap should sound at the same time each note is audible.
Clap Notes
Select a specific gem color you want to trigger claps.
Vocal Tones
Enables or disables the sounding of piano tones in PART VOCALS. See the Testing and editing lyric pitches section of the vocal tutorial for details.
MIDI Tones
Enables or disables the sounding of MIDI notes through your computer's default MIDI device to play a synthesized version of pro guitar/bass notes during playback. If a capo is placed on the track, the capo is taken into account. When this feature is enabled, clicking on a pro guitar/bass note will sound the tones for the note. A MIDI tone delay value can be specified in File>Settings that will allow MIDI tones to play back earlier than notes, in order to compensate for MIDI lag from factors outside of EOF. You can change what MIDI voices are used for the pro guitar and bass tracks by closing EOF, opening eof.cfg in EOF's program folder and changing the MIDI instrument number given for the eof_midi_synth_instrument_guitar and eof_midi_synth_instrument_bass entries. eof_midi_synth_instrument_guitar_muted and eof_midi_synth_instrument_guitar_harm entries can also be edited to define a different MIDI instrument number used to play back for palm muted or harmonic pro guitar notes. The numbering used for this begins with 1, as in instrument number 1 indicates "Acoustic Grand Piano".
Bookmark
Place a bookmark at the current location of the position line. You can seek directly to your bookmarks (see Song>Seek) at any time. If you are going to be seeking to a specific part of a song multiple times, having a bookmark there can save lots of time.
Selection
Select or deselect notes based on various criteria.
Select All: Selects all the notes in the current track difficulty.
Select Like: Selects notes in the current track difficulty that match any of the currently selected notes. If a vocal track is active, notes match if they have the same pitch. If an instrument track is active, notes match if they use the same lanes. If a pro guitar/bass track is active, the fret values must also match.
Precise select like: Is similar to "select like", but also requires notes to have the same statuses (ie. both forced HOPO) in order to match. If a pro guitar/bass track is active, the ghost status for each gem must also match.
Select Rest: Selects all notes from the currently selected note to the end of the song.
Select Previous: Selects all notes from the beginning of the song to the currently selected note.
Deselect All: Deselects all notes.
Invert selection: Makes notes in the active track difficulty that aren't selected become selected and vice versa.
Conditional select / deselect: Allows you to specify criteria to select/deselect notes based on the gems they do or don't have. If the active track is a drum track, it will allow you to specify whether or not the specified gems in lanes 3, 4 or 5 must be cymbals or toms to be selected/deselected. If the active track is a pro guitar/bass track, it will allow you to specify whether or not the specified gems must be normal, muted or ghosted in order to be selected/deselected.
Select / deselect
Chords: Applies to notes that have more than one gem.
Single notes: Applies to notes that have only one gem.
Toms: Applies to notes that are tom notes (gems in lanes 3, 4 or 5 that are not marked as cymbals).
Cymbals: Applies to notes that are cymbal notes (gems in lanes 3, 4 or 5 that are marked as cymbals).
Grid snapped: Applies to notes that are grid snapped with the current grid snap value.
Non grid snapped: Applies to notes that are not grid snapped with the current grid snap value.
Shorter than: Prompts for a threshold length in milliseconds, and then applies to all notes in the active track difficulty that are shorter than that length.
Longer than: Prompts for a threshold length in milliseconds, and then applies to all notes in the active track difficulty that are longer than that length.
Of length: Prompts for a threshold length in milliseconds, and then applies to all notes in the active track difficulty that are exactly that length.
On beat notes: Applies to notes that are on a beat marker.
Off beat notes: Applies to notes that are not on a beat marker.
Highlighted: Applies to notes that are highlighted.
Not highlighted: Applies to notes that are not highlighted.
One in every: Applies to one out of every specified number of selected notes. Which note in the sequence is affected can also be specified, so you can select/deselect the first out of every two notes, the second out of every three, etc.
Set start point
Set end point
Defines the current seek position as the start or end points for the Create preview audio, Export chart range and Export audio range functions.
Song
[ Seek ] [ Track ] [ File Info ] [ Audio cues ] [ Display semitones as flat ] [ Waveform graph ] [ Spectrogram ] [ Highlight non grid snapped notes ] [ Catalog ] [ INI Settings ] [ Properties ] [ Leading Silence ]
[ Lock tempo map ] [ Disable click and drag ] [ Pro Guitar ] [ Rocksmith ] [ Second piano roll ] [ Manage raw MIDI tracks ] [ Create preview audio ] [ Test In FOF ] [ Test In Phase Shift ]
Seek
Perform various seek operations, which move the position line to the desired location. The rewind function, for example, seeks to the position of the last time playback started. If grid snap is enabled, the seek previous/next grid snap functions are enabled, otherwise they are disabled. There are two seek to end style functions, one seeks to the end of the currently loaded audio, and the other seeks to the end of the chart. If a file was imported without suitable audio, those two end positions may be different.
Track
Select a track for editing. PART GUITAR is the default track. Tracks containing notes will have an asterisk (*) displayed next to them. All tracks are edited in a similar way. Some tracks such as PART DRUMS and PART DANCE will appear differently in the piano roll and the 3D Preview.
File Info
Display various information about the current project.
Audio cues
Opens a dialog window allowing you to change the volume for the chart audio and any of EOF's audio cues: Clap, metronome, vocal tone and vocal percussion. This will affect the volume of the cue when it is sounded during playback or when the chart is stopped (such as when clicking on a lyric or vocal percussion note). This dialog allows you to select the sound that will be used for a vocal percussion note (See Percussion sections in the vocal tutorial for details). This dialog also allows you to choose whether ghost notes (pro guitar or drum notes) or string muted pro guitar notes will trigger the clap sound cue.
Display semitones as flat
Displays piano note (see the Advanced topics section of the vocal tutorial for details) and pro guitar chord names with flat notation instead of sharp notation.
Waveform graph
Provides the ability to show, hide and configure a waveform graph for the currently active OGG file. To generate the graph, use the "Show" item in this menu or simply press the F5 key when the chart is not playing. After a few seconds, the graph will be displayed as per the settings in the "Configure" dialog menu. For each vertical slice (one pixel wide) of the graph, the minimum amplitude in that portion of the audio (rendered in dark green by default), the peak (maximum) amplitude (rendered in light green by default) and the root mean square (think of this as the average) amplitude (rendered in red by default) are displayed. In the "Configure" menu item, you can specify whether the left audio channel, the right audio channel or both audio channels will be graphed. You can also specify whether the graph will be scaled to fit within the fretboard area or the entire editor window (the area above the scroll bar and the below the playback control buttons). When both the left and right channels are being graphed, the left channel is drawn on top of the right channel. Once the waveform graph has been initially generated, you can show/hide it with the F5 key. If you load another OGG file (see File>Load OGG), the waveform graph will not be recreated until it is hidden and shown again. This will, for example, allow you to generate a graph for a drum track and then load another audio file. If you load or import a chart, any existing waveform graph will be discarded and will need to be created again by showing the graph.
The default colors can be altered by editing the eof.cfg file that EOF creates in its program folder when it exits. The colors are defined in hexadecimal in standard RGB format where each color intensity is a two digit value from 00 (none) to FF (maximum). The first two digits are the red intensity, the second set of two digits are the green intensity and the third set of two digits are the blue intensity. If an RGB value has leading zeros, they can be omitted, so "00FF00" will be considered the same as "FF00". As an example, the color fuchsia can be defined with a red intensity of 255 (FF in hexadecimal), a green intensity of 0 (00 in hexadecimal) and a blue intensity of 255 (FF in hexadecimal). To have EOF render the peak amplitudes of the waveform graph in fushsia, edit the value of the "eof_color_waveform_peak" entry in song.ini to "eof_color_waveform_peak = FF00FF". The trough (minimum) and RMS amplitudes can have custom colors defined the same way. There are various hex color charts and calculators available on the Internet that may help you find interesting colors, such as http://welcowebdesign.com/color.html. To reset to the default waveform graph colors, just delete the waveform color definitions under the [colors] section of eof.cfg and save the file. Do note that you must save your changes after EOF is closed, because the program will rewrite the current colors when it exits, and this would otherwise overwrite your changes.
Spectrogram
Provides the ability to show, hide and configure a spectrogram for the currently active OGG file. A spectrogram is a 3D graphical representation of audio, where the X axis is time, the Y axis is frequency and the color is amplitude. The window size in the spectrogram's configuration determines how much of the audio is represented by each column (pixel) of the graph. To generate the graph, use the "Show" item in this menu. Displaying the spectrogram is much more processor intensive than the waveform graph, so unless your computer is very powerful, you may get a lot of stuttering if you try to play back the chart while the spectrogram is being displayed. Increasing the buffer size dramatically may help counter this, but playback lag might be unavoidable without using Song>Spectrogram>Show again to hide the spectrogram.
By default, the bottom of the graph is approximaely 0Hz, and the top is half the sample rate of the sound file - for your typical 44kHz rate, it will be 22KHz. Each vertical block of color represents a small range of frequencies, and is color coded to indicate how much of that particular pitch is present in that section of the sound. Depending on how much other noise there is, you may be able to see individual tones or notes in the graph. If you want to learn more about spectrograms, Wikipedia is a great place to start.
In the "Configure" menu item, you have options for controlling the graph, similarly to the Waveform Graph. In addition, you can choose a color scheme (currently just color or grayscale), whether the vertical scale should be logarithmic (helpful for music, as the musical scale is logarithmic in frequency), and window size, and note range.
Window size is a parameter used when generating the spectrogram, and specifically is the width of the sample used for each column (or slice). Due to how spectrograms are created this also determines how many slices the frequency spectrum will be sliced into (how many "bins"), or how many rows are in the column. Effectively, higher window sizes get you better resolution on the vertical (frequency) axis, lower window sizes get you better resolution in the horizontal (time) axis.
The note range option, if activated, limits the graph to show only the chosen range of frequencies (given in 12-tone musical note names, use # and b for sharp/flat), so as to better see parts of the graph you are more interested in.
In order to save processing time, the program selects a single amplitude value from each frequency bin. This generally doesn't cause a noticeable difference, but you can enable the "Avg Freq" option to average the values in each bin instead.
Highlight non grid snapped notes
Dynamically highlights notes that aren't on any grid snap position, indicating they may need to be manually moved/resnapped. If a custom grid snap value is in effect, its positions are also checked. The highlighting updates when notes are moved/resnapped or the grid snap value in use changes to/from a custom setting.
Catalog
Perform various catalog related operations. The catalog contains portions of your song which you can play back or paste into other parts of the song (see "Edit>Paste From"). "Show" toggles the catalog display. "Add" adds the currently selected notes to the catalog. "Delete" deletes the current catalog entry. "Previous" selects the previous catalog entry. "Next" selects the next catalog entry. "Find previous" and "find next" will find the previous or next instance of the current fret catalog entry in the current track difficulty. It is considered a matching instance as long as the notes' gems are the same pattern (ie. red, red+green, blue), the notes' length and spacing doesn't matter. Optionally, increase the fret catalog's width so that it takes up the full width of EOF's window. The name and timing of the catalog entry can also be edited if desired. See the Catalog section of Editing Songs for more details about the fret catalog.
INI Settings
Define additional INI settings which are not available in Song Properties.
Properties
Change the song properties for the current project.
"Song Title" is the name of the song.
"Artist" is the artist the song is attributed to.
"Frettist" refers to the person who created the "Frets On Fire" note charts.
"Album" is the name of the album the song is on, which can help people tell different versions of a song apart.
"Delay" is the delay or MIDI offset value which tells "Frets On Fire" how much time to delay the notes. Changing the "Delay" setting alters the position of all the beat lines in the current project and optionally adjusts the note positions as well.
"Year" refers to the year the song was released.
"Diff" refers to the band difficulty (tier) of the song as a whole.
"Lyrics" refers to the optional song.ini parameter that indicates to FoFiX that it should display Script style lyrics during chart playback using the file script.txt. If this checkbox is checked, and your chart has lyrics defined, EOF will create the script.txt lyric file (as well as a simplified plain text lyrics.txt file) automatically during a save operation and enable it in the chart's song.ini file. This will provide subtitle style lyrics for various versions of Frets on Fire, even those that did not support scrolling lyrics. Since script.txt requires the lyrics to be line synced, the script.txt file will not contain lyrics that are not defined within lyric lines, and EOF will present a warning if there are any lyrics with this problem. The script.txt export will not work if the project folder's path contains Unicode of extended (ie. accented) ASCII characters.
"8th Note HO/PO" refers to the optional song.ini parameter that overrides FoF's default Hammer On/Pull Off settings, specifying that a single note (probably not chords, but this may vary between versions of FoF) in any guitar track that is 1/8 of one measure apart or closer to the previous note will be a HOPO note and not require a strum. This song.ini parameter should work in RF-Mod based versions of FoF, such as RF-Mod, Alarian and FoFiX.
"Use fret hand pos of 1 (pro g)" refers to an advanced feature relating to authoring custom pro guitar content for Rock Band. When this option is enabled, EOF will export the MIDI so that a single fret hand position of fret 1 is written for the 17 and 22 fret pro guitar tracks, instead of writing a fret hand position for each note in the expert difficulty of each of the two tracks. This allows dislike guitar parts to be authored in different difficulties of the same guitar track, which would otherwise have fret hand markers written based on the notes in the expert difficulty, but if the fret numbers used get too high, it can lead to RB3 displaying incorrect fret numbers for those gems.
"Use fret hand pos of 1 (pro b)" refers to an advanced feature relating to authoring custom pro guitar content for Rock Band. When this option is enabled, EOF will export the MIDI so that a single fret hand position of fret 1 is written for the 17 and 22 fret pro bass tracks, instead of writing a fret hand position for each note in the expert difficulty of each of the two tracks.
"Use accurate time signature" specifies whether to use updated logic that properly changes the length of a beat takes the time signature's denominator (the "beat unit") into acount as it does in music theory. To prevent unwanted alteration for existing projects' beat timings, this is not enabled by default for existing projects, but can be enabled or disabled by going into Song>Properties and toggling the "Use accurate time signatures" option. When this option is changed, if the project uses any non #/4 time signatures, EOF will offer to alter tempos so that beat positions remain the same. Time signature changes that change the denominator are forced to be anchors, to prevent the ability to accidentally corrupt the tempo map. File imports have been updated to handle this setting being enabled for new projects, and GPA import will forcibly enable this option because the Go PlayAlong format writes its timings in a way where time signatures must be taken into account. Functions in the "Beat>Time signature" menu are now disabled as appropriate if the tempo map is locked, to ensure the beat positions remain unaltered.
"Loading Text" is the text that appears on the loading screen while your song is loading in "Frets On Fire" (currently only supported in FoFiX). If this field is populated, it is used to create a message box displayed at the beginning of the song when used for Rocksmith. You can put date/time tags in the loading text and they will be expanded to the current date/time values (see http://www.cplusplus.com/reference/ctime/strftime/ for usable tags) for the Rocksmith message box.
EOF stores all these settings in the ".eof" project file and exports relevant options to "song.ini" when saving for compatibility with "Frets On Fire."
Leading Silence
Allows you to insert silent audio at the beginning of the chart audio, for purposes of allowing enough time before the first beat marker or simply give the chart a polished look by easily adding a controlled amount of leading silence before the first beat marker without having to alter the audio in another program such as Audacity. Unless necessary for syncing purposes, it's best to sync the first beat marker for your chart (see the EOF Tutorial for details) before using this feature. When you access the Leading Silence feature, you have the option of adding a specified number of milliseconds' or beat's (based on the first beat's tempo) worth of silence (only positive, whole numbers) to beginning of the chart via two different options: The first option (Add) simply adds the specified amount of silence whereas the second option (Pad) will take the first beat marker's position (MIDI delay) into account to adjust the chart so that the amount of silence added moves the first beat marker to the specified position from the start of the audio. The appropriate amount of silent audio is created and the currently loaded OGG file is joined to it. For example: If you have synced a chart to have a MIDI delay of 225, adding 100ms of silence will result in the chart having a MIDI delay of 335 afterward. If you pad to 500ms of silence instead, it will result in the chart having a MIDI delay of 500ms afterward.
EOF takes precautions to preserve the original audio, making this function safe to use. When this feature is used to add silence to the beginning of a chart, the original audio for the currently loaded OGG file (see Load OGG for details) is saved with a ".backup" file extension, allowing you to restore the original audio file manually if necessary. The undo and redo features are also compatible with this function, so you can simply undo and redo the adding of leading silence as desired. If you have already made enough changes so that there are not enough undo states to revert the addition of leading silence, you can open the leading silence feature again and add 0 ms of silence, and the original audio will be restored. That will also wo
Editing Songs
Article Content
22 sections Section of 22
Editing Songs
Now let's get into the heart of EOF, editing songs. EOF has several edit modes and each one operates in a different fashion. In order to get the most out of EOF you will want to use an edit mode that you are comfortable with. Before we go there, you will need to have a song opened for editing.
[ Creating Songs ] [ Loading Songs ] [ Saving Songs ] [ Edit Modes ] [ Recording Input ] [ Editor Keys ] [ Notes ] [ Beat Markers ] [ Tracks ] [ Catalog ] [ Events ] [ Big Rock Endings ] [ Drum Fills ]
Creating Songs
To create a new song, select "File->New" from the menu.
Loading Songs
There are two ways to load a song in EOF. The first way applies to songs that were created using EOF. Select "File->Load" and navigate to the "notes.eof" file that is in the folder of the song you want to edit. The second way applies to songs that were created in other editors that you wish to work on in EOF. Select "File->MIDI Import" and navigate to the "notes.mid" file located in the folder of the song you want to edit. It is recommended that you not use MIDI Import if you have a corresponding "notes.eof" as each subsequent load and save will degrade the accuracy of the note positions in the song. Instead, if you are going to work on a project that was started in another editor, use MIDI Import the first time and Load it from "notes.eof" for subsequent edits.
EOF supports loading EOF projects and importing MIDI songs into EOF projects through the command line. You can configure your operating system to associate ".eof" with EOF so that double clicking them will automatically launch EOF and load the project. It is not recommended that you associate EOF with MIDI files as they are a standard music format and should be associated with a proper music player. If you install a new version of EOF in a different location you will need to re-associate ".eof" files if you want this feature to continue working.
Saving Songs
To save your work, select "File->Save." When you save your song, EOF saves three files: "notes.eof," "notes.mid," and "song.ini." "notes.eof" is the song data in EOF's native format. The ".eof" format holds the Artist, Title, Frettist, the precise positions of the notes and beat markers, and other project details. "notes.mid" is the FOF compatible notes. "song.ini" is the song information file used by FOF. Additionally, "guitar.ogg" will be created if one does not exist in the folder where the song files are being saved. If you are wondering why EOF doesn't just load and save directly from and to MIDI it is because I wanted to guarantee that the note positions would be exactly the same with each load/save. A lot of calculations are done to create a properly formatted MIDI file and inaccuracies in floating-point math could lead to slight changes in note positions over several editing sessions.
Edit Modes
[ Classic Edit Mode ] [ Piano Roll Edit Mode ] [ Hold Edit Mode ] [ RexMundi Edit Mode ] [Guitar Tap Edit Mode ] [Guitar Strum Edit Mode ] [ Feedback Edit Mode ]
Before I describe the individual edit modes there are a few things that all edit modes (also referred to as "input methods") have in common. Firstly, all editing takes place in the edit pane that is located across the top of the screen. There are four tabs corresponding to the four different difficulty settings in FOF. The tab that is pulled to the front is the one that is currently being edited. To pull another tab to the front just click on the tab you want. Difficulties which contain notes will have an asterisk (*). In all edit modes notes are placed using the "pen." In some modes the "pen" is positioned at the mouse's x position on the screen. In others it is located at the green song position marker. How the pen operates depends on which edit mode you are using.
Classic Edit Mode
Classic edit mode is the original edit mode used by early versions of EOF. In this mode the "pen" has note toggles corresponding to each lane. To toggle them use the keys 1-6. Right-click to place a note at the position of the pen. Pressing enter will place a note at the current seek position instead of the pen position.
Piano Roll Edit Mode
Piano Roll edit mode works similarly to MIDI sequencer programs. The note colors are selected by positioning the mouse where that note color would be on the fret board. To add a note, right-click the position you want to add a note. If there is already a note at the position you right-click the color you click will be toggled within the note that is already there.
Hold Edit Mode
Hold edit mode is exactly the same as Classic mode except you don't toggle the note colors. Instead you hold the corresponding number (1-6) and right-click to add the note at the position of the pen. Pressing enter will place a note at the current seek position instead of the pen position.
RexMundi Edit Mode
RexMundi edit mode is exactly like Piano Roll mode except you use the keys 1-5 to toggle notes at the current pen position instead of right-clicking them.
Guitar Tap Edit Mode
This mode is useful if you have a guitar controller hooked up to your computer and would like to tap out the notes on the fret buttons as the song plays. In this mode you cannot place chords or sustained notes. See the section Recording Input below for details on how to use this input method.
Guitar Strum Edit Mode
This mode is similar to Guitar Tap except you must strum (assigned to Enter and Backslash keys by default) in order to place notes. This mode allows chords and will place notes as if you were actually playing the song in FOF. If PART BASS is selected during playback, and you have enabled open strum bass notes (see the Enable open strum bass section), you can add an open bass strum by performing an up or down strum with all five fret buttons NOT pressed. See the section Recording Input below for details on how to use this input method.
Feedback Edit Mode
This mode is similar to some of the controls in the Feedback (also known as "dB") chart editor. The left/right arrow keys increases/decreases the grid snap size, the up/down arrow keys seek forward/backward by one grid snap interval, Pg Up/Dn seeks one measure forward/backward (4/4 is assumed if no time signature is in effect), the 'A' key toggles the anchor status of a beat if the seek position is on a beat, the Delete key deletes a note at the current seek position if there is one if there are no notes explicitly selected, keys 1 through 6 toggle gems at the current seek position, the +/- keys alter the tempo of the beat at or immediately before the seek position (instead of the anchor at/before the seek position as in other edit modes). After seeking by grid snap/measure and during playback, the selected beat is updated to track the seek position. When playback is stopped, the seek position is moved to the closest grid snap interval. If no notes are selected, various note manipulation functions will apply to the note at the current seek position. In addition to using the mouse to select notes, you can hold the SHIFT key and seek by grid snap or measure to highlight a section of the fretboard and the notes it encompasses in order to manipulate multiple notes at once. Press and release the SHIFT key without performing any keyboard shortcuts to clear the selection. The playback speed keyboard shortcuts (; and ') change the speed in 10% increments instead of 25%.
Since Feedback input mode places decreased importance on using the mouse for editing the chart, you can have the 3D preview window take up the entire EOF window by right clicking within the piano roll area and selecting "Full screen 3D view", or by using the CTRL+F shortcut. While the 3D window is full screen, mouse controls are disabled. So although the 3D window can be displayed full screen in any inupt mode, only Feedback input mode can enter notes when this feature is active. The info panel contents are displayed in the top left corner of the full screen 3D window, but if the text is in the way, you can toggle the display of the info panel with CTRL+I. Use CTRL+F again to exit full screen 3D view, or use the option from the right click menu.
In addition to displaying the 3D preview full screen, you can change the 3D camera height by holding SHIFT and using either the - or the + key on the number pad. Or if you are using a keyboard where this is difficult to do (ie. a laptop keyboard), you can use the alternate keyboard controls of Backslash or SHIFT+Backslash. You can reset the 3D camera height by holding SHIFT and pressing the Enter key on the number pad, or by using CTRL+Backslash.
Recording Input
EOF allows you to define buttons for and use a keyboard/game controller/etc. to place notes while EOF plays the chart. While this is not really an accurate method to chart, it does allow for some improvisational charting that you can edit to your liking afterward. The guitar frets, two strum keys (one for up, one for down), 4 drum pads and a bass pedal are definable keys to use for inputting notes in PART DRUMS or in any of the guitar or bass guitar tracks. To set up your controller for having EOF accept your input during playback i na guitar/bass track, follow these steps:
- Tune EOF for smooth playing. Especially if you're going to place notes during playback, it is recommended that you have configured EOF's settings so that the AV delay has been configured accurately (See "Setting Up Your AV Delay") and that the buffer size is adequate enough to allow for playback without any stuttering/skipping of the audio. Enable or disable "Disable Vsync" and "Smooth Playback" in EOF's settings as needed so that the chart scrolls smoothly during playback.
- Open EOF's File menu and select Controllers. Click the Guitar button and for each button you want to define/change, select the button, click the Redefine key and then press the key/controller button you want to use. EOF will let you use any game controller or nearly any key on the keyboard, but will not allow you to set the Spacebar to any guitar or drum button because it is used to start/pause chart playback. Pressing Escape will cancel the button definition and undefine that controller button. If EOF doesn't seem to be accepting your game controller's input, verify that it is plugged in and that your Operating System recognizes that it is connected. If you plug the controller in after EOF starts, you may need to restart EOF before it can detect the controller. Defining the strum key is only necessary if you will be using the "Guitar Strum" input method, since the "Guitar Tap" method does not use a strum to record notes during chart playback. If any of the buttons are mapped to use the same key or controller button, EOF will present a warning to bring this to your attention. Make sure all of the strum and fret definitions have a unique button set to them. Once you are finished mapping all of your buttons, click the OK button to return to EOF. Open EOF's Preferences menu and select the Guitar Tap or Guitar Strum input method, none of the other input methods allow you to record guitar notes during playback.
- Open a beat synced chart. You can open one that you or somebody else created if you are certain it is correctly synced, or simply have EOF import the MIDI file for one of the Rock Band charts with decrypted audio. Ensure Grid Snap is turned OFF. Begin playback of the chart and enter notes in time with the music, such as on every drum beat. If you configured everything correctly, you should see notes being placed on the chart while the chart is playing. After you have entered at least a few notes, you can pause playback by hitting the Spacebar. If you are not satisfied with your timing, you can optionally remove the notes you placed, play back the chart and add some more notes.
- While the chart is NOT playing, use Shift+PgUp/PgDn to seek to one of the notes you placed during playback and note the position time (given in minutes:seconds:hundredths of seconds)
- Use PgUp to seek to the beat immediately before the placed note and note the difference in time between this position and the position of the note from the above step.
- Examine multiple other placed notes and note the time difference between where the note is and where it was intended (on a beat line). Average these time differences and use that as your controller delay. The delay is measured in milliseconds instead of hundredths of seconds, so multiple the average time difference you got in step 3 by 10. You can enter this delay value by opening the File menu, selecting Controllers, clicking the Guitar button, clicking the Delay input field and typing the delay value you determined. Click OK to return to EOF.
- With Grid Snap still turned OFF, play the chart again, placing notes in time with the music. If the notes are still not being placed on the beats even though you know you are tapping in the correct rhythm and that the chart is beat synced, increase or decrease the controller delay slightly and repeat this step again. If several of the notes you place are landing on beat lines, then you are finished configuring the controller delay. Controller delay may change from one controller/keyboard to the next, so make sure to check each time you use a different input device to place notes during chart playback. If you use the same set of controllers, you can make a note of which delay each uses and just edit the delay to the correct value each time you change controllers without having to test for the correct delay each time.
Note: PART DRUMS uses the defined keys (defined in File>Controllers>Drums) to place notes when the chart is playing and the drum track is being displayed, even if you aren't using the Guitar Strum or Guitar Tap input methods. This "Drum Record" input method is designed to react like a drum instead of a guitar, such as by not placing sustained notes, allowing you to hold the bass pedal down and only placing a bass drum note when you press the defined button down from a released state. If you are using the same controller (ie. keyboard) for recording drum notes as you are for guitar notes, you can enter the delay you set for the guitar controller delay into the drum controller delay (File>Controller>Drums). Otherwise, mapping the keys to a connected controller and testing to find the correct delay is done the same way as with the guitar controller delay.
When your controllers and their delays are set up, you are ready to use the Guitar Strum, Guitar Tap and "Drum Record" input methods to place notes in your charts. If you are placing notes on a beat synced chart, make sure that you have Grid Snap enabled to your preferred setting. If you have a hard time playing in a really accurate timing, you can use a larger Grid Snap value such as 1/4 or 1/8 and EOF will round your recorded notes up or down to the nearest grid snap position as they are placed. If you have not beat synced the chart, make sure Grid Snap is turned off before having EOF record notes onto the chart during playback, or else the Grid Snap logic will cause the notes to NOT be placed accurately to reflet your input.
Editor Keys
In order to effectively use EOF you will need to familiarize yourself with the controls. Below is a list of all the controls you will need to know:
Space Bar:
Play/Pause the music. Hold Control to play at half speed. Hold Shift to play the current catalog entry.
Left/Right:
Use Left/Right to scroll through the song. To scroll faster, hold Shift. To scroll slower hold Control. To scroll in single millisecond increments, hold both Shift and Control.
Page Up/Page Down:
Seek to the previous/next beat marker.
Right-Click/Insert (notes):
Add a new note to the song.
Left-Click (notes):
Select the highlighted note for editing. Hold Control while clicking to select multiple notes. Hold Shift while clicking to select a range of notes.
Left-Click+Drag (notes):
Move selected note(s).
Mouse Wheel:
Scroll the mouse wheel up/down to change the length of the currently selected notes. Alternately, you can use the '[' and ']' keys to do the same. If grid snap is disabled, the wheel changes the length in 100ms increments, but if Shift is being held, it changes the length in 10ms increments instead.
1-6:
Does different things with the note colors depending on the current edit mode.
Left-Click (beats):
Select the highlighted beat.
Left-Click+Drag (beats):
Move the beat marker. An anchor is automatically created when you move a beat marker. Surrounding BPMs will be adjusted automatically. An anchor will not move unless dragged (unless a manual BPM Change is added), non-anchored beats will adjust to fit. Hold Shift when dragging a beat to prevent the notes within from being adjusted with the beat markers. Useful if you are beat syncing someone else's songs, for instance.
Right-Click (beats):
Seek to the highlighted beat line.
For another listing of available controls visit "Help->Keys" in the EOF menu.
Notes
In EOF songs are made up of Notes and Beat Markers. Each note can contain up to six colors allowing you to place chords as well as single notes. Note positions are stored in absolute time and are accurate to the millisecond. The length of the note is also stored as a duration in milliseconds.
Beat Markers
Beat markers appear on each beat throughout the entire song. You don't have to mind the beat markers in order to create a synchronized song but most people find it desirable to do so. EOF takes a different approach to beat markers compared to the other editors as it doesn't force your notes to line up with the beat markers. Instead, you are free to place your notes in sync with the audio and synchronize the beat markers later on. This allows you to quickly make a playable song and leaves it up to you whether or not you want to spend the extra time making the beat lines line up with the notes.
Tracks
Originally Frets On Fire only allowed you to play one track per song. When Guitar Hero 2 came out FOF added support for playing Bass, Rhythm, and Lead Guitar tracks in addition to the standard Guitar track. EOF allows you to include all of these tracks if you so desire. By default, the Guitar track (PART GUITAR) is selected but you can choose another track by going to "Song->Track" and selecting the track you want to edit. PART DRUM is not currently supported by FOF but there are mods available from the community that allow you to play the drum track. You can add drums to your song without worrying as only FOF versions that support PART DRUM will recognize the track. If you want a mod with full support for PART DRUM, you will probably want to get FoFiX (the most actively developed version of FOF at the time of this writing).
Note that PART GUITAR COOP will be displayed as "Lead Guitar" in "Frets On Fire."
Catalog
EOF provides a fret catalog where you can store selections of notes for the current song. If, for instance, you have a song that has a repeating guitar riff, you simply select all the notes in that riff and select "Song->Catalog->Add" from the menu to add them to the catalog. Once you have some notes in the catalog, you can open the catalog ("Song->Catalog->Show") and see the catalog entries you've added. Use the playback controls to listen to entries as desired. You can paste notes from the catalog using the "Edit->Paste From->Catalog" menu item, so authoring the same riff is fast and easy. "Paste From->Catalog" will paste the notes from the currently selected catalog entry into the song starting at the beat in which the position line is set.
In addition to using the keyboard shortcut and menu function to show/hide the catalog, you can also click on the top line of text in the information panel (clicking "Information Panel" displays the catalog and clicking "Fret catalog" displays the information panel).
Events
Some Frets On Fire mods allow you to use additional events in your songs for things such as adding a solo section. EOF allows you to place events at any beat marker in the song by first selecting a beat marker and then going to "Beat->Events" in the menu. From the "Events" dialog box use the "Add," "Edit," and "Delete" buttons to edit your events for the currently selected beat. You can view a list of all events for the entire song in "All Events" dialog ("Beat->All Events").
One neat thing you can do with events is add Practice mode sections to your song. To define a Practice mode section for use in FoF, FoFiX or Phase Shift, simply add a text event to the beat where you want the section to start and name it "section whatever" where "whatever" is replaced with the name of the section as you want it displayed in the game. This, however, is FoF notation. If you want to create section markers for use in Rock Band, the event should use one of the pre-defined names in the Rock Band Network documentation. Events that are recognized as section markers are displayed in yellow at the top of the editor window above beat that defines it. To review all sections for a chart, open the "All Events" dialog and filter to show section events (see "Beat->All Events").
Text events can also be used to define guitar solos in FoF/FoFiX but this method is deprecated (see "Note->Solos" for the correct way to define solo sections). Nonetheless, I will explain how to do so. To mark a solo section you simply add a text event at the start of the solo named "solo_on" and one at the end of the solo named "solo_off." Solos marked this way will appear in the Practice mode listing. Alternately, naming your event "section Guitar_Solo" or something containing the word "solo" will start a solo section. Solo sections defined this way will end when the next text event not containing the word "solo" is reached. You will need to define section markers where your solo sections are if you want them to show up in the Practice Mode listing. Do note however that if you have defined any section events as per the previous paragraph, this causes FoF to disable the "solo_on"/"solo_off" system, and you will need to mark the solo phrases either with "Note>Solos" or by defining section events that specify a solo.
The [end] text event has a special meaning in that it marks the end of the chart. When the MIDI is written during save, EOF will not write any events that occur after this event if it has been defined. If the chart being saved has a note whose tail extends beyond an [end] event, the end of the note won't be written and the MIDI file may malfunction. If no [end] event is manually defined, EOF will automatically place one at the end of the chart.
Big Rock Endings
To add a big rock ending for an instrument, click the "BRE" tab for the desired instrument track and place a five note chord that runs the desired length of the BRE section. For a drum track, you also have to place a text event saying big_rock_ending at the beat where the BRE starts, otherwise the game will treat it as a drum fill section instead.
Drum Fills
A drum fill is a freestyle drum section that ends in a note that the drummer must hit in order to deploy overdrive. To author a drum fill, author a five note chord in the desired area of the chart in PART DRUMS's "BRE" tab. This is essentially the same thing as marking a big rock ending, except you do not place a big_rock_ending text event.